by Alison | Your Crochet Biz
The Sewing Lady
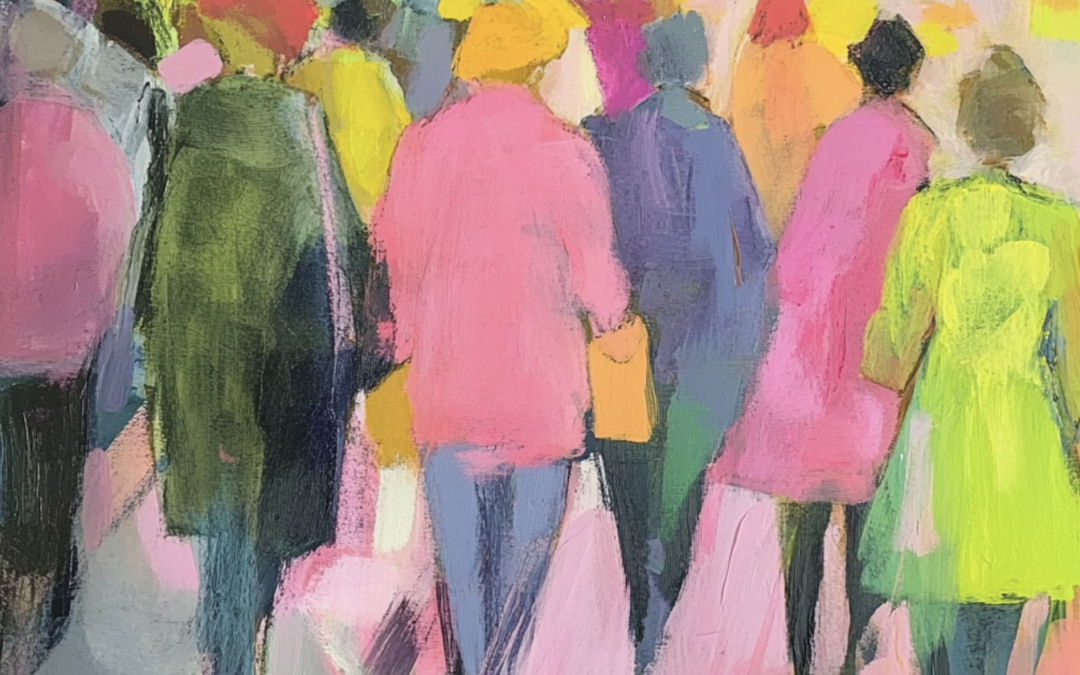
 Kate sewed. She loved sewing. She made sweat pants for the six month to two year age group. She sewed up her samples and took orders from her friends and a small order from local kids clothing shop. It was small potatoes but she kept going. She enjoyed working with her hands.
Kate was retired and had the time to give to her sewing. She only sat at her machine in the day and only when the light was good. She started sewing at 10am and worked until 3pm each day from Monday to Friday.
At first she sewed in the colour and with the cloth she liked. As time went on she took orders for ten blue and ten red sweat pants. these were the popular colours for the pants.
The Sweet Spot
By buying the cloth in bulk (and getting a little discount from the draper), and making ten blue and red size small, all in one sitting she reached her sweet spot where she could not be any more efficient. At this stage she could make 19 pants a week. This was not that many really but more than she made as a hobby.
This was how her production was; cutting out on Monday, sewing the main seams on Tuesday, finishing off the garments on Wednesday, pressing the pants on Thursday and packaging and posting her finished items on Friday. Week in and week out.
It was a case of no work and no pay.
Full production
Now whilst this is good in the short term (six months) there comes a time when you can’t keep up with the orders. The kid’s shop that took ten a week had a branch in another city and wanted ten for that shop as well. What to do?
If Kate got sick she couldn’t sew. She was turning over $40 and making $160 each week at full tilt. But 19 was all she could make. She could only make nineteen sweatpants a week. If she took a day off she made less money.
Time and money
The realization eventually came to her that she could never make more money – only make less. That no matter how hard she tried there was a physical limit to how much she could do each week and it all depended on her doing it.
With no one else to help and no more time she could do no more and earn no more money. And, the sweat pants kept her so busy she couldn’t do the creative wrk that had drawn her to sewing in the first place.
The Challenge
It is a challenge faced by many crafters between earning some money, which is important, and being creative and enjoying what you do. This is known as piece work when you are paid by the item. If there are no items to sell there is no pay for you. But piecework is an entry into having an independent micro business and this is what attracts many people every year – freedom. Piecework has its place and can be sustained indefinitely. It is what I recommend to crafters to get them going. Take the plunge and put you crafts out there.
You may also like:
Author Bio
Alison is a passionate crochet enthusiast and dedicated business blogger. She combines her love for crafting and entrepreneurship to inspire and connect with others.
With a knack for transforming yarn into beautiful creations and a flair for sharing valuable insights about running a successful crochet business, Alison embodies the perfect blend of creativity and practicality.
Read more about Alison’s crochet journey.
More Articles
If you enjoyed this post and crochet is your thing, you may like some other crochet articles from our blog.
by Alison | Basics, Patterns
Entrelac crochet
Entrelac crochet is a method of working on the side of previously crocheted pieces. The rows go in different directions and not just straight up. It creates an interesting piece and is strong. This method is usually done with color as the defining result.
Fair Isle crochet
Fair isle crochet is similar to Fair Isle knitting. Each row is worked with two colors and they change throughout the row to make designs in color. Each row has two different colors and the colors change every few rows.
For example:
Row 1: Red and blue
Row 2: Red and green
Row 3: Green and blue
But because each row only has two colors that sets the thickness of the finished item. The Fair Isles are in Scotland and women shepherdesses would tend their flocks of sheep with crochet hooks and balls of wool in their pockets. They would walk the highlands on foot working their crochet as they went.
Filet crochet
Filet crochet is a French type of crochet created in squares. The finished piece looks like a grid with open and closed spaces. The combination of open and closed results in flat pictures of roses or swans or whatever.
Filet designs were originally used to make lace curtains to cover cottage windows. These days filet crochet is used for table cloths, place mats and can be hung as art.
Filet crochet can be done in the round and resultss in beautifully intricate designs.
Tapestry crochet
Tapestry crochet is used to make thick baskets and rugs. It is a sturdy technique and the items are very firm.
You use several colored threads at once, working with one color and carrying the rest along the top of the row being worked. This makes each row very thick.
Color is changed on a stitch by stitch basis. Bowls are a good example of tapestry crochet.
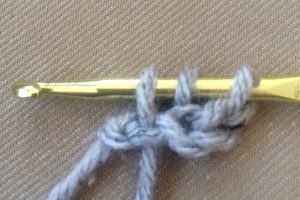
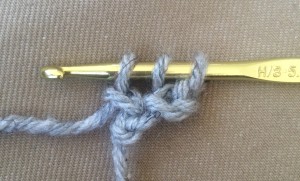
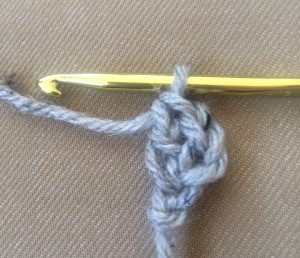
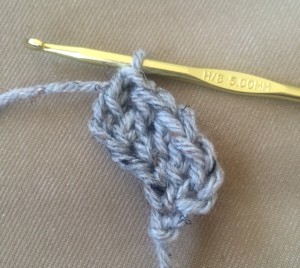
Tunisian crochet
Tunisian crochet is also referred to as afghan crochet. For Tunisian crochet you use a special hook (called a Tunisian crochet hook), which typically has a crochet hook at one end and is as long as a knitting needle and has a knitting needle stop end at the other. So really it is like a knitting needle but with a hook and not a point.
Below are my two favourite Tunisian crochet hooks, (in my size 5mm as usual), and these have hooks at both ends opening up the possibilities for advanced Tunisan crochet work.
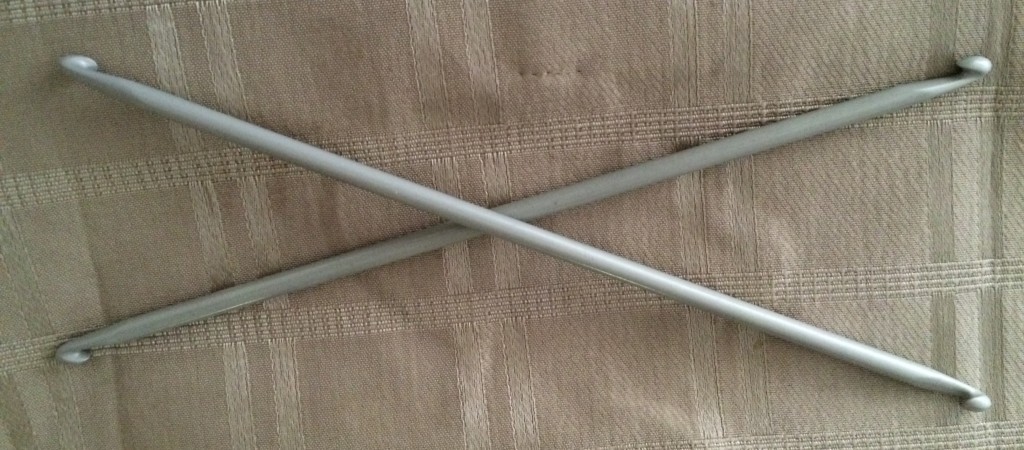 Tunisian crochet hooks come in all the same sizes as regular crochet hooks. With Tunisian crochet you carry many stitches at once on forward rows and hook them off on the backward rows.
Tunisian crochet makes a very thick fabric and is normally used for blankets, cushions, bags and soft furnishings.
Tunisian crochet is like a combination of crochet and knitting all in one. It is an advanced technique. Tunisian crochet can be combined with entrecôte crochet.
[/et_pb_text][/et_pb_column][/et_pb_row]
More Articles
If you enjoyed this post your may like some other articles from our blog.
[/et_pb_section]
by Alison | Basics, Patterns
Features of a crochet diagram pattern
In general
Reading a written crochet pattern assumes many things.
Such as:
- That you can read English
- That you use either UK or USA stitch names
- That the pattern is written correctly
- That the pattern instructions are clear
Let’s look at each one by itself.
It assumes that – you speak English
I speak English as probably you do to as you are reading this. But I also like to use patterns from other countries.
I think the Japanese crochet diagrams are the best. They are clear and precise and I don’t have to read Japanese to use the patterns.
Likewise, if I design a crochet garment and I only write the pattern in English words, then other world wide crocheters can’t read my work.
I want my designs to be used by all crocheters and that is why I write the pattern in English and draw the crochet stitch diagram to go with it.
Almost every pattern on my site and my books are both written and have a diagram.
It assumes that – you know the difference between a UK or USA stitch
The difference between UK and USA crochet stitches and why the diagram is clear.
The UK double crochet and treble crochet are the same as the USA single crochet and double crochet.
The actual stitch is the same but the name of the stitch is different.
Double Crochet (USA) is the same as Treble Crochet (UK)
- Yarn over hook (two loops on hook)
- Insert hook into stitch below.
- Yarn over hook, and pull through stitch below (three loops on hook)
- Yarn over hook, pull through two loops (two loops remain on hook).
- And then, yarn over hook, pull through two loops (two loops remain on hook).
- Yarn over hook, pull through last two loops (one loop remains on hook).
It assumes that – the pattern is written correctly
In a written crochet pattern there are lines of code for the pattern rows. Such as:
RSF R1, yoh (rep5.) 3tr, 2ch 1FPst (rep. from * to * 8 times) turn.
Now in the above sentence (if it is a sentence), any error in the typing (a typo) will create an error in the pattern. And the crafter will not be able to complete the garment because she can’t read the pattern.
In a long pattern with motives, sections and finished borders there could be over 100 lines of pattern instruction. One line will create a problem and often there are two or three errors in a pattern.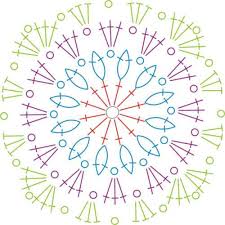
This makes the whole job a frustration and the crocheter may give up and (this is the worse part), tell others that your patterns are always incorrect and they should avoid them.
This is not good if you are in the business of selling patterns.
It assumes that – the instructions are clear
There comes a time in written crochet patterns when they will benefit from more explanation. This is achieved by expanding on the instructions and writing instructions in plain English.
We can all do with clarity at times. And crochet patters are no exception.
If a pattern is too hard to understand because of how it is written then it will not work. That pattern is no good.
Crochet diagrams symbols
Diagram symbols
In diagram a there is one symbol for every stitch.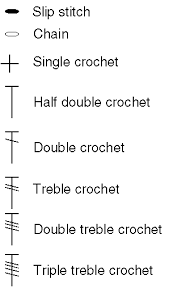
Chain
Slip stitch
Double crochet
Treble crochet
Each symbol is drawn separately.
Diagram rows
Each row is numbered.
Every row has an arrow indicating which way the row is worked. Either left to right, right to left or in the round.
Typically each Rosie drawn in a different color so you ca clearly see which row you are on. Here I use black and blue to separate the rows.
Benefits of crochet pattern diagrams
A picture is worth a thousand words. And this is true of crochet diagrams.
- Uses left brain of visual imagery.
- Designer can be non-native English speaker.
- The diagram can be read by everyone on earth.
- Clarity uses less space. One page for each project.
- Can be printed bigger for older eyes.
- Kids can use them.
You may also like:
by Alison | Your Crochet Biz
 Your Money and Self Worth
We feel good when we have money. But how much money we need to have in order to feel good is relative.
Some people actually feel better when they have less or even not enough.
It depends where you come from and your family, background and upbringing, that determines how you feel about money and self worth.
Sometimes the road to financial bounty needs a little help from within. This has nothing to do with your earning ability but is a deep issue that can be a blockage to building a thriving micro-business.
If you are serious about growing your crochet business or other craft venture then think about whether you have accepted roadblocks to wealth and prosperity.
A Vow of Poverty
Some people have taken a vow of poverty.
A vow of poverty is often an unconscious decision to be poor. You believe that it is your fate to be poor, and that you cannot be otherwise, no matter how hard you work or what you do.
It may not have been a conscious vow of poverty, or even taken in this lifetime, but if you think this may be you then you need to release yourself from any vow of poverty.
Write the following on a piece of paper:
I free myself from any vow of poverty taken in this life or a past life.
I humbly accept my bounty as deemed by God.
I am worthy of a financially good life while on planet Earth.
It is in my spirit to prosper.
Amen
Now revoke your vow of poverty by saying out loud the written vow. If you feel you need more affirmation then read it out loud to yourself every night before bed.
Next you have to live by this freedom.
You will start to believe that you have permission to:
- Earn a fair wage or salary
- Earn a good income
- Accept all offers of financial help
- Consider every wealth improvement idea
- Charge for your goods and services at market value
- Charge above market value for things you are highly skilled in doing
- Honor ever cent you get
- Respect your money as you respect yourself
These simple steps can clear the free flow of abundance towards your life.
Embrace it.
by Alison | Your Crochet Biz
Author: Alison – Updated: Febrary 2025
Your Crochet Business
What is a micro business?
A micro business is any little business that makes money. For example when you crochet something and sell the finished product or the pattern. Typically a micro business is a one man (or woman) show. If you crochet (or knit or craft) and sell your items you have a micro business.
A micro business can also be referred to as a the new word of solopreneur. Like an entrepreneur, but going solo, or on your own. A micro business can grow to two, three or four people working together but it is usually that one person does it all, all the business things like:
- The ideas,
- design,
- sourcing materials,
- manufacturer of the items,
- advertising,
- production,
- marketing,
- promoting,
- website management,
- social media, pricing,
- selling and
- banking.
Phew!
More Crochet Business Articles
You may not realize you have a micro business
If you make items and give them to others or to charity then you are not a micro business. If you do take money for your crafted items then you have a micro business.
Good karma
All income and costs need to be declared to the tax man. Don’t start pocketing the cash if you do it creates bad karma around money for you in the future.
You want the money to flow towards you and that you will prosper. If you cheat the system you create blockages for the money stream and this stops other good things like prosperity Being able to gravitate towards you.
Start today and get your abundance flowing in
Note every cent in and out from day one. You will likely get a refund anyway if your turnover is low and under one thousand dollars a year. Do not worry about this now, but make records. Money in and out. Keep receipts for every purchase for your creations like that ball of yarn from the wool shop or a new paintbrush for your art.
Start today. Let the universe know that you are in business. If you think you may have taken a vow of poverty now is the time to let it go.
Thought, Word and Deed
Process
First you think of the idea of say, to make a hat. Then you speak about your ideas to make the hat. Then you do the deed and make the hat. There is a sequence to creativity. I want to add another step and that is to journal the process and to capture the moment.
Journaling your Ideas
Get a notebook. Open it to the first double page spread.
Left-hand Page
On the left hand side draw the image of the item, the pattern diagram the finished garment. Here you can add the color palette and note or a sketch any special details.
Right-hand Page
On the right hand page write “Hat” (or whatever your craft project is) at the top. Write all the details of the yarns, pattern, hook and instructions to make the hat. Two thirds of the way down the page draw a line across the page.
In the lower right part express your feelings about the project. Are you excited, scared, happy, overwhelmed, or finally at peace? Keep your notebook handy. Over the days and weeks of the project, journal the process and your feelings about the item.
Choosing your Notebooks
I like Moleskin notebooks. Size A5 which is about 5” wide by 8” long. Get the one with plain blank pages and no lines. On a side note, they also have a screenwriters design with a story board format which is fun to use for a “How-to” project.
Creative Journal
Don’t let another idea pass you by. Note it in your creative journal. You can go back over your many ideas later and weed out what is good and doable, and look at why a project is not going to get done. Become used to capturing your ideas.
Author Bio
Alison is a passionate crochet enthusiast and dedicated business blogger. She combines her love for crafting and entrepreneurship to inspire and connect with others.
With a knack for transforming yarn into beautiful creations and a flair for sharing valuable insights about running a successful crochet business, Alison embodies the perfect blend of creativity and practicality.
Read more about Alison’s crochet journey.
More Articles
If you enjoyed this post and crochet is your thing, you may like some other crochet articles from our blog.
by Alison | Your Crochet Biz
Author: Alison – Updated: February 2025
Crochet in Cosmopolitan: My Piecework Journey
How It All Began
The Advert
One morning, as I flipped through the local newspaper, a small advertisement caught my eye:
“Crocheters wanted. Meet me at the Table View Mall café at 12 noon on Saturday. – Jenny”
As a crocheter, I felt like this message was meant for me. Curiosity got the best of me, and I decided to go.
When I arrived at the café, I quickly realized I wasn’t the only one. Around 25 to 30 women were already there, chatting over coffee, each seemingly drawn to the same mysterious ad.
A few minutes past noon, Jenny arrived—tanned, with long blonde hair and a confident presence. She carried a bag filled with little squiggly items and placed one in front of each of us. Then, she passed around small balls of colorful shirring elastic along with ten decorative beads per person.
New Item
The mysterious squiggly thing turned out to be a barefoot sandal—a delicate crochet accessory worn on the beach. It looped over the big toe and wrapped around the ankle, decorated with African beads for a boho-chic summer look.
Jenny smiled at us and said, “Make me a sample just like this one and meet me back here next Friday at the same time.”
There was excited chatter as everyone examined the materials and planned their approach. I headed home, sample in hand, eager to give it a try.
The Challenge of Crochet Piecework
Crafting the Sample
The pattern itself was simple, but working with the stretchy shirring elastic? That was another story. The elastic pulled and shifted, making it tricky to get the right tension. After multiple attempts and testing different hook sizes, I finally produced a sandal that closely matched Jenny’s sample.
When Friday arrived, I sat at the café, sipping my coffee, waiting for the crowd of crocheters to return. But no one else showed up.
At five past twelve, Jenny walked in, spotted me and came over to check my work. She examined my sample and nodded in approval. Another woman arrived soon after with her own attempt, which also met Jenny’s standards.
Out of the dozens of women who had shown up the previous week, only two of us had followed through.
The Start of My Crochet Business
Summer Stitching
And so, the work began.
Jenny offered us $50 for every ten pairs of barefoot sandals. She then sold them at her flea market stall at Green Market Square for $25 per pair.
I crocheted whenever I could—early in the morning, late at night, and during stolen moments throughout the day. This was no small feat, given that I had a six-month-old baby, a toddler, and two school-aged children (eight and eleven years old). On top of that, we were in the middle of a home renovation, which left our kitchen in disrepair for months.
Onwards
Still, I pressed on, determined to meet my weekly quota.
Each Friday, I met Jenny at the café, exchanged my finished barefoot sandals for cash, and collected new materials for the next batch. This routine continued for six months, keeping me busy throughout the summer.
Jenny’s stylish designs, along with her sun-kissed feet, even made their way into Cosmopolitan magazine. And there, in the glossy pages, was a photo of the very barefoot sandals I had crocheted.
What I Learned About Crochet Piecework
Commission
Although this chapter eventually came to an end, it was a rewarding experience. Here’s what I learned:
- Piecework is great while it lasts. It provides a steady income but is often seasonal or temporary.
- You need the skill to do the work. Crocheting with precision, especially with tricky materials, is key.
- You need the time to commit. Even small projects require dedication, especially when juggling family life.
Looking back, that summer of crochet and barefoot sandals was a turning point for me. It taught me the value of my craft and opened the door to future opportunities.
Who knew that answering a small newspaper ad would lead to seeing my work featured in a magazine?
Author Bio
Alison is a passionate crochet enthusiast and dedicated business blogger. She combines her love for crafting and entrepreneurship to inspire and connect with others.
With a knack for transforming yarn into beautiful creations and a flair for sharing valuable insights about running a successful crochet business, Alison embodies the perfect blend of creativity and practicality.
Read more about Alison’s crochet journey.
More Articles
If you enjoyed this post and crochet is your thing, you may like some other crochet articles from our blog.
by Alison | Basics
Pattern and Color
Many crochet projects use pattern and color to add to the beauty of the item. Crochet excels at being flexible and there are so many patterns and color ways to choose from it can become overwhelming at times. Knowing when to use either pattern or color is important to the aesthetic integrity of your item. It is not usual to mix pattern and color changes together in the same garment.
When to use pattern stitches
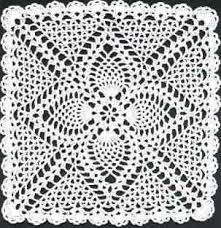 Use a pattern stitch with a yarn that is a plain solid color. Use a pattern stitch for a garment that is one color all over. Do not use pattern with a variegated yarn and do not use pattern with multiple colors as you can’t see the beauty of the pattern in amongst the color changes.
- An example of pattern over color is this intricate white square.
When to use color combinations
 Color is best used on plain stitch items where the stitches are all the same and the color changes and combinations add to the beauty of the item.
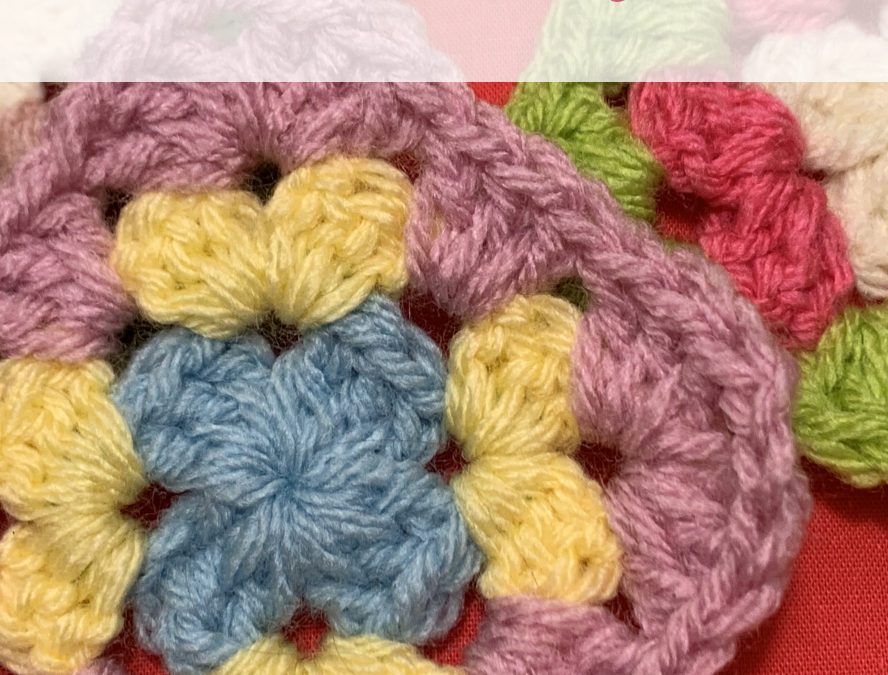
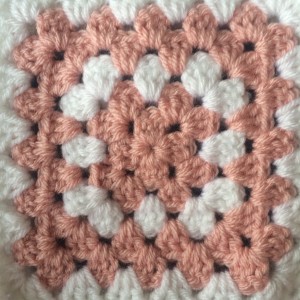
- An example of color over pattern stitches is the granny square.
By spending some time choosing your color and patterns wisely you can vastly improve your handcrafted crocheted items.
by Alison | Stories and Yarns
Joe’s Story
Background
Joe was married and had three kids at school. Joe’s skill was woodworking. His talent was crafting wooden doll‘s houses. With having two daughters he had made the first doll’s house when the girls were very young and they had hours of fun playing with it. Joe worked in a factory. He did not earn much and Christmas was coming.
Doll’s House
That year he designed a traditional doll’s house. The roof was painted in magic green and this set off the rustic style of the house beautifully. The side hinged out so a child could play with the dolls and furniture and live out a fantasy life in miniature.
One year Joe made a sample house and invited the neighbours around to see and hopefully to take orders. Joe got ten orders for his doll’s house that night. That meant he had four weeks to complete the work. He was excited. The next Monday be received an order or another five houses from the original people who had seen the sample house, and who had told their friends. And so it was. Joe had verbal orders to build fifteen wooden doll’s houses by Christmas Eve. He did.
He worked a forty-hour week at the factory and then every evening after dinner he started sawing and nailing wood in his garage. He worked every weeknight until midnight and all day at the weekend. It took time. Every piece was cut and sanded by hand. The sides were glued and nailed together. The paint had to dry. He took pride in his work.
The Plan
He had bought all the materials he needed to make the houses for around $200. Joe planned to sell them for $20 each. So, his fifteen houses would be (15 x $20 = $300), giving him a profit of $100. This was the plan. In the end he made the fifteen doll’s houses.
He was paid for ten as he delivered them the day before Christmas Eve but did not get paid for the final five. Why, because he was too late in delivering them (the plan was Christmas Eve) but the people who had ordered the houses from him got nervous, that they would be let down, and so they bought other gifts for their kids. That meant they did not have the cash to pay for the doll’s houses they had ordered from Joe. In the end Joe broke even and was left with five doll’s houses.
Of course he may have broken even in the money numbers, but he was not compensated for all the work he had done for the past four weeks. That effort he was not paid for. He was tired and had no extra cash for his family for their Christmas meal and gifts. During the New Year he managed to sell the other houses, eventually.
What Went Wrong?
This happens often that crafts people go into micro businesses (which is what it is if you make things to sell) not fully understanding the time commitment required and how to price correctly for their hand made goods.
Joe could have:
- Taken a deposit for each order.
- Delivered the houses one-by-one as they were made.
- Charged a bit more for each house.
- Got help building the houses.
- Made fewer houses, at a better price, that could have been delivered early.
How You Can Benefit
You can benefit from Joe’s story in your micro business. There are a few things you can do to improve how you manage you small craft business and I will discuss them in future posts.
- Your first sale.
- How to calculate the true cost of your hand crafted items.
- What to charge for your hand crafted goods.
- How and why you should take a deposit.
- How to respect your skills and charge accordingly.
- What to do with the money you make.
Author Bio
Alison is a passionate crochet enthusiast and dedicated business blogger. She combines her love for crafting and entrepreneurship to inspire and connect with others.
With a knack for transforming yarn into beautiful creations and a flair for sharing valuable insights about running a successful crochet business, Alison embodies the perfect blend of creativity and practicality.
Read more about Alison’s crochet journey.
More Articles
If you enjoyed this post and crochet is your thing, you may like some other crochet articles from our blog.