No Results Found
The page you requested could not be found. Try refining your search, or use the navigation above to locate the post.
Author: Alison – Updated: March 2025
B&G is like the fun code I use for the main things which I create in crochet. Don’t get me wrong, I can do all types of crocheting, but when it comes down to it, my true love and where I am strong creatively, is in blankies, and grannies. As a personal quirk, I love to call it “B and G” or B&G.
B&G is all about creating beautiful crochet blankets and other projects using granny squares. I absolutely love making granny squares and turning them into cozy blankets. Over the years, I’ve also made garments from granny squares like my Country Jacket, but I always have a granny blanket in some stage of progress on the hook, it’s just part of my crochet life!

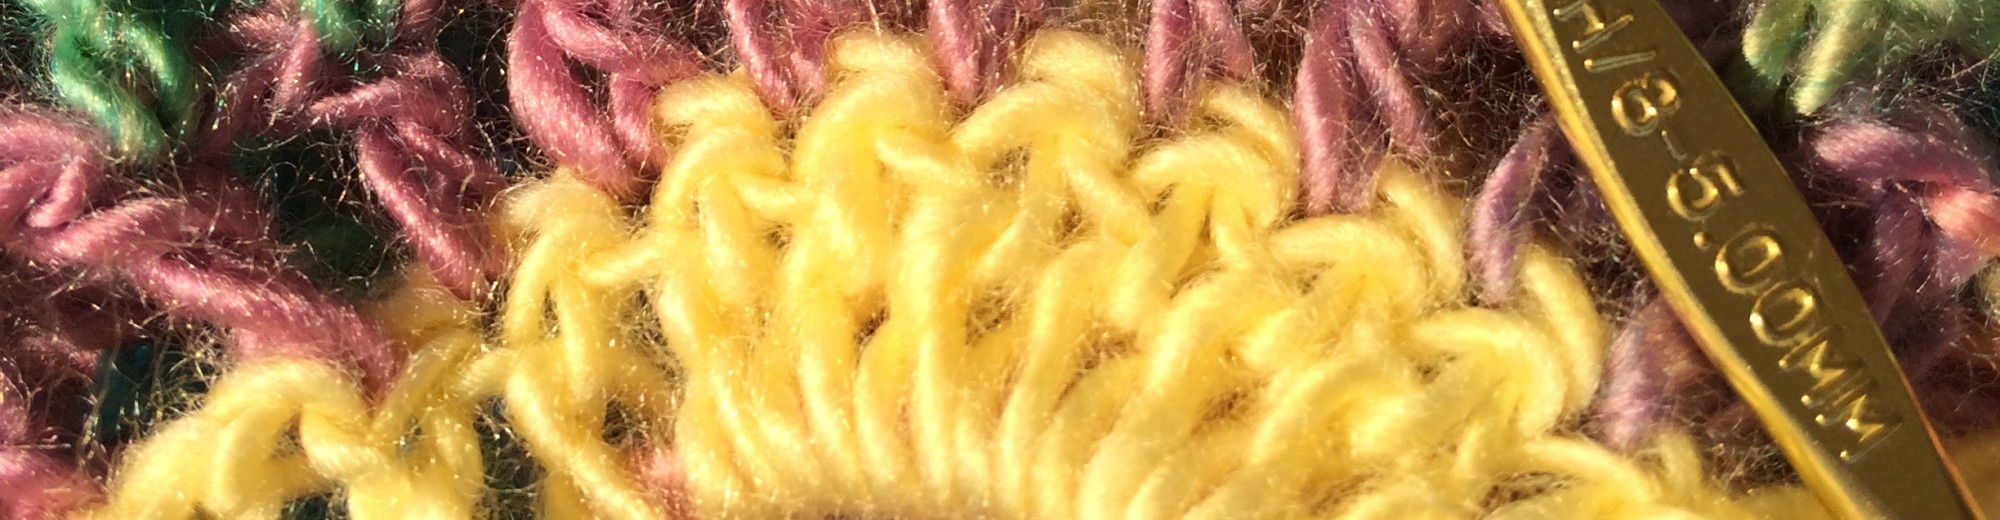
Granny squares, or “grannies,” are the iconic building blocks of crochet. They are everywhere in the crochet world, and for good reason! Simple yet versatile, they allow you to create endless combinations of colors, textures and patterns. I have a favorite pattern my basic gr nny with a twist which might look familiar to many seasoned crocheters. But the beauty of granny squares lies in their adaptability. With just a few tweaks, you can create something uniquely yours.
There are many variations of granny squares, depending on the stitch combinations used. A few favorites include:
Despite their name, granny squares don’t have to be square! They can be adjusted into hexagons, triangles, or even circles. You can use granny squares to make all sorts of crochet goodies:
A “blankie” is a sweet term for a small, comforting blanket, but blankets come in all shapes and sizes. Many are made from granny squares, but there are also other styles of crochet blankets to explore.
There are different types of blankies that you can make with granny squares.
The difference between these blankets often comes down to yarn choice and size. A delicate baby blanket in pastel shades might follow the same pattern as a thick, chunky adult throw, but the look and feel will be entirely different.
The standard granny square size is around 10 cm (4 inches) square, but you can make them as large or as small as you like. One of the best things about granny squares is how portable they are! You can crochet small squares anywhere:
Since you’re working on small pieces, it’s easy to take your crochet with you wherever you go.
For me, crochet is all about variety, so I always have at least two or three projects on the go at any one time.
I usually have something quick and portable like a headband, soap tidy, granny square bag or dishcloth. These can be completed in one day.
My medium projects perhaps can be a bag, poncho, shawl or wrap. These can be completed in one week.
A large double-bed blanket, kept at my favorite crochet spot for long, relaxing evenings. These projects take weeks or even months to complete. I like to do one each season so, spring, summer, autumn and winter, this gives me three months which is enough time for me to complete a full size blanket.
How do you work with granny squares and blankets in your crochet journey? Do you:

Pin this to read later.

Alison is a passionate crochet enthusiast and dedicated business blogger. She combines her love for crafting and entrepreneurship to inspire and connect with others.
With a knack for transforming yarn into beautiful creations and a flair for sharing valuable insights about running a successful crochet business, Alison embodies the perfect blend of creativity and practicality.
Read more about Alison’s crochet journey.
If you enjoyed this post and crochet is your thing, you may like some other crochet articles from our blog.
The page you requested could not be found. Try refining your search, or use the navigation above to locate the post.
Making Space for Crochet Special Places I have a cherished spot in my home that's dedicated to my crocheting. It's where I spend a lot of my creative time. At any given moment, you'll find me working on at least two crochet projects. One of them is usually a...
The page you requested could not be found. Try refining your search, or use the navigation above to locate the post.
Author: Alison – Updated: February 2025
Repetition is a fundamental part of our human experience. From an early age, we find solace in familiar patterns. As children, we beg to hear the same bedtime story over and over because knowing the ending makes it less scary. Predictability brings comfort.
As we grow older, this craving for repetition manifests in the routines we build. We take the same route to work, follow a familiar schedule, and frequent the same restaurants, often ordering the same dishes. There is security in the predictable.
This is why you favor one restaurant over another or choose a particular coffee shop, not just for the quality of the food or drink but for the reliability of the experience. If you order a No. 3 burger and fries at a fast-food chain in your hometown, you can expect the exact same meal at a franchise across the country or even on another continent. A grandé latte at Starbucks in Vancouver will taste the same as one ordered at Heathrow Airport. This consistency reassures us.
On a fundamental level, the unknown is unsettling, even intimidating. But the known? That feels safe, comfortable, and familiar.

Crochet embodies this concept beautifully. At its core, it consists of simple stitches—loops and knots repeated again and again to form intricate designs. Once you grasp a pattern, you enter a state of effortless flow. Whether you are crafting a single motif or assembling a full blanket, the process remains predictable, soothing, and deeply satisfying.
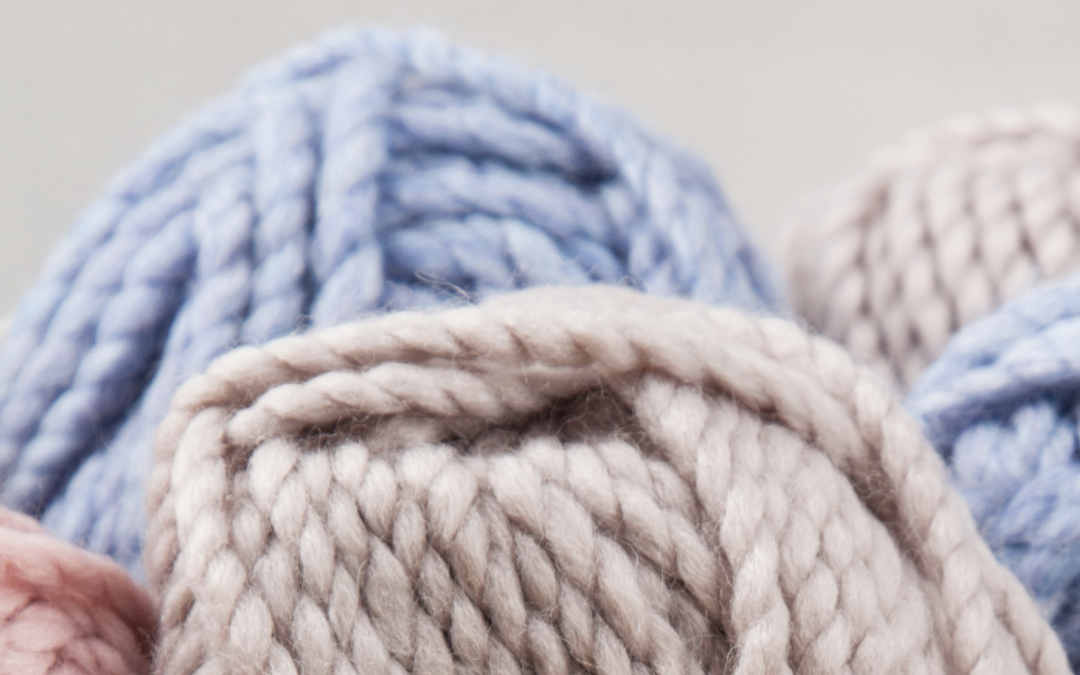
Consider the classic granny square. Each one is identical in structure, offering a sense of accomplishment with every completed piece. The only decision might be whether to use pink or blue yarn, a choice that feels manageable and unthreatening. Because crochet follows a set formula, it offers a therapeutic escape from the unpredictability of daily life.
When life feels chaotic, repetitive tasks act as an anchor. The act of doing something over and over brings peace to frazzled nerves. After a long, stressful day at work, picking up a crochet hook and settling into a familiar rhythm can be incredibly relaxing. It may appear like work, but unlike the demands of a job, it carries none of the pressure.
At work, you never truly know what will happen. Will the cash drawer balance at the end of your shift? Will your boss be in a bad mood? Will a coworker call in sick, leaving you with extra responsibilities? Work environments can be unpredictable, filled with challenging colleagues, high expectations, and constant demands.
Crochet, by contrast, is entirely within your control. Each stitch follows the last in perfect order. You can see the progress unfolding in your hands, and there are no surprises.

Repetitive actions—whether it’s listening to a familiar song, cooking a favorite meal, or crocheting a simple pattern—offer a refuge from the chaos of life. They remind us that, even in a world of uncertainty, some things remain constant. And in that constancy, we find peace.
Beyond crochet, there are numerous ways repetitive actions bring comfort and stability to our lives. Many people find similar solace in activities like knitting, baking, gardening, or even journaling. These tasks, though simple, provide a rhythm that helps quiet the mind and soothe anxiety.
For instance, gardening follows the same seasonal cycles year after year. There is a familiar comfort in planting seeds, watching them sprout, and tending to the growing plants. The repetition of watering, pruning, and harvesting allows the gardener to feel connected to something greater, a natural order that brings reassurance.
Similarly, journaling can be a form of structured repetition. Writing down thoughts, recounting daily events, or listing things to be grateful for can create a grounding ritual. Knowing that you can always return to the same process provides stability amid uncertainty.
Even physical activities, such as running or yoga, benefit from repetition. A morning run or a consistent yoga practice helps establish routine and order, offering a dependable retreat from stress. The rhythm of footsteps on a trail or the repetition of sun salutations fosters a meditative state, allowing the mind to rest even as the body moves.
Repetition is more than just a habit—it is a doorway to mindfulness. When we immerse ourselves in repetitive tasks, we are fully present in the moment. Each stitch, each breath, each step becomes a meditative act, drawing us away from worries about the past or the future.
This is why so many cultures incorporate repetition into spiritual practices. From the rhythmic chanting of mantras to the careful, measured strokes of calligraphy, repetition fosters deep focus and tranquility. The act itself becomes a form of meditation, grounding us in the present moment.
In a world filled with distractions and uncertainties, embracing the power of repetition can be a sanctuary. Whether through crochet, gardening, journaling, or movement, these simple, repetitive actions remind us that peace is often found in the familiar.

Pin this to read later.
Alison is a passionate crochet enthusiast and dedicated business blogger. She combines her love for crafting and entrepreneurship to inspire and connect with others.
With a knack for transforming yarn into beautiful creations and a flair for sharing valuable insights about running a successful crochet business, Alison embodies the perfect blend of creativity and practicality.
Read more about Alison’s crochet journey.
If you enjoyed this post and crochet is your thing, you may like some other crochet articles from our blog.
The page you requested could not be found. Try refining your search, or use the navigation above to locate the post.
Making Space for Crochet Special Places I have a cherished spot in my home that's dedicated to my crocheting. It's where I spend a lot of my creative time. At any given moment, you'll find me working on at least two crochet projects. One of them is usually a...
The page you requested could not be found. Try refining your search, or use the navigation above to locate the post.
At Old English Creations, we believe that crochet is more than a craft—it’s a soothing ritual that nurtures your mind and spirit. Our Calm Crocheter newsletter is designed to inspire and support your crochet journey with a focus on relaxation, mindfulness and creativity.
Explore thoughtfully designed crochet patterns that bring calm to your crafting.
Learn techniques to transform your stitching into a meditative experience.
Discover ways to use crochet to unwind, de-stress, and practice self-love.
Enjoy early access to patterns, discounts, and special giveaways.
Find your rhythm, one stitch at a time. Embrace the soothing art of crochet and weave moments of calm into your day. Subscribe now and let each stitch bring you closer to serenity. Join Us and Start Your Calm Crocheter Journey Today!
Together, let’s create moments of calm, one stitch at a time.

Alison Heathcote is a passionate crochet enthusiast and dedicated business blogger. She combines her love for crafting and entrepreneurship to inspire and connect with others.
With a knack for transforming yarn into beautiful creations and a flair for sharing valuable insights about running a successful crochet business, Alison embodies the perfect blend of creativity and practicality.
Read more about Alison’s crochet journey.
If you enjoyed this post and crochet is your thing, you may like some other crochet articles from our blog.
Making Space for Crochet Special Places I have a cherished spot in my home that's dedicated to my crocheting. It's where I spend a lot of my creative time. At any given moment, you'll find me working on at least two crochet projects. One of them is usually a...
Shawl and Wrap Shapes Wraps are rectangles and shawls are triangles. This is the general consensus. You can get semi-circle wraps as well. But in this post I'm discussing the structure of crocheted triangles. Triangles A triangle has three sides and three...

Author: Alison - Updated: November 2024 Crochet Basics Getting Started About Crochet Crochet is a vast subject. and you really need to know a few of the basics before you can really get into it. This post is just to go over a few of the basic points and in crochet...
Author: Alison – Updated: November 2024
Crochet is a vast subject. and you really need to know a few of the basics before you can really get into it. This post is just to go over a few of the basic points and in crochet with links to other topics as well.
The history of crochet is rich and fascinating, though its exact origins remain unclear. Unlike knitting, which dates back to ancient times, crochet as we know it likely emerged in Europe during the 16th century. The term crochet comes from the French word for “hook.” Early crochet was often used to create lace-like decorations, especially in France, Italy, and Ireland. In the 19th century, Irish crochet became a source of income during the Great Famine. By the 20th century, crochet evolved from delicate lacework to practical and decorative items like blankets, garments, and accessories, making it a beloved craft worldwide.
Learn more about crochet hooks.
Learn more about yarns you can use.
When it comes to crochet, there are a few fundamental stitches that form the building blocks of nearly every pattern. These stitches—simple on their own—can be combined in endless ways to create beautiful textures, intricate designs, and stunning pieces of handmade art. Whether you’re crafting a delicate lace doily, a cozy granny square blanket, or a textured sweater, mastering these essential stitches is key to unlocking your full creative potential in crochet. From the basic chain stitch that starts most projects to the versatile single and double crochet stitches, each stitch plays a unique role in shaping patterns, adding depth, and bringing your creative vision to life. By learning how to mix, modify, and layer these stitches, you can explore an infinite world of possibilities, designing everything from classic motifs to modern masterpieces.
Here is more on the five stitches that you need to know.

Alison is a passionate crochet enthusiast and dedicated business blogger. She combines her love for crafting and entrepreneurship to inspire and connect with others.
With a knack for transforming yarn into beautiful creations and a flair for sharing valuable insights about running a successful crochet business, Alison embodies the perfect blend of creativity and practicality.
Read more about Alison’s crochet journey.
If you enjoyed this post and crochet is your thing, you may like some other crochet articles from our blog.
Shawl and Wrap Shapes Wraps are rectangles and shawls are triangles. This is the general consensus. You can get semi-circle wraps as well. But in this post I'm discussing the structure of crocheted triangles. Triangles A triangle has three sides and three...
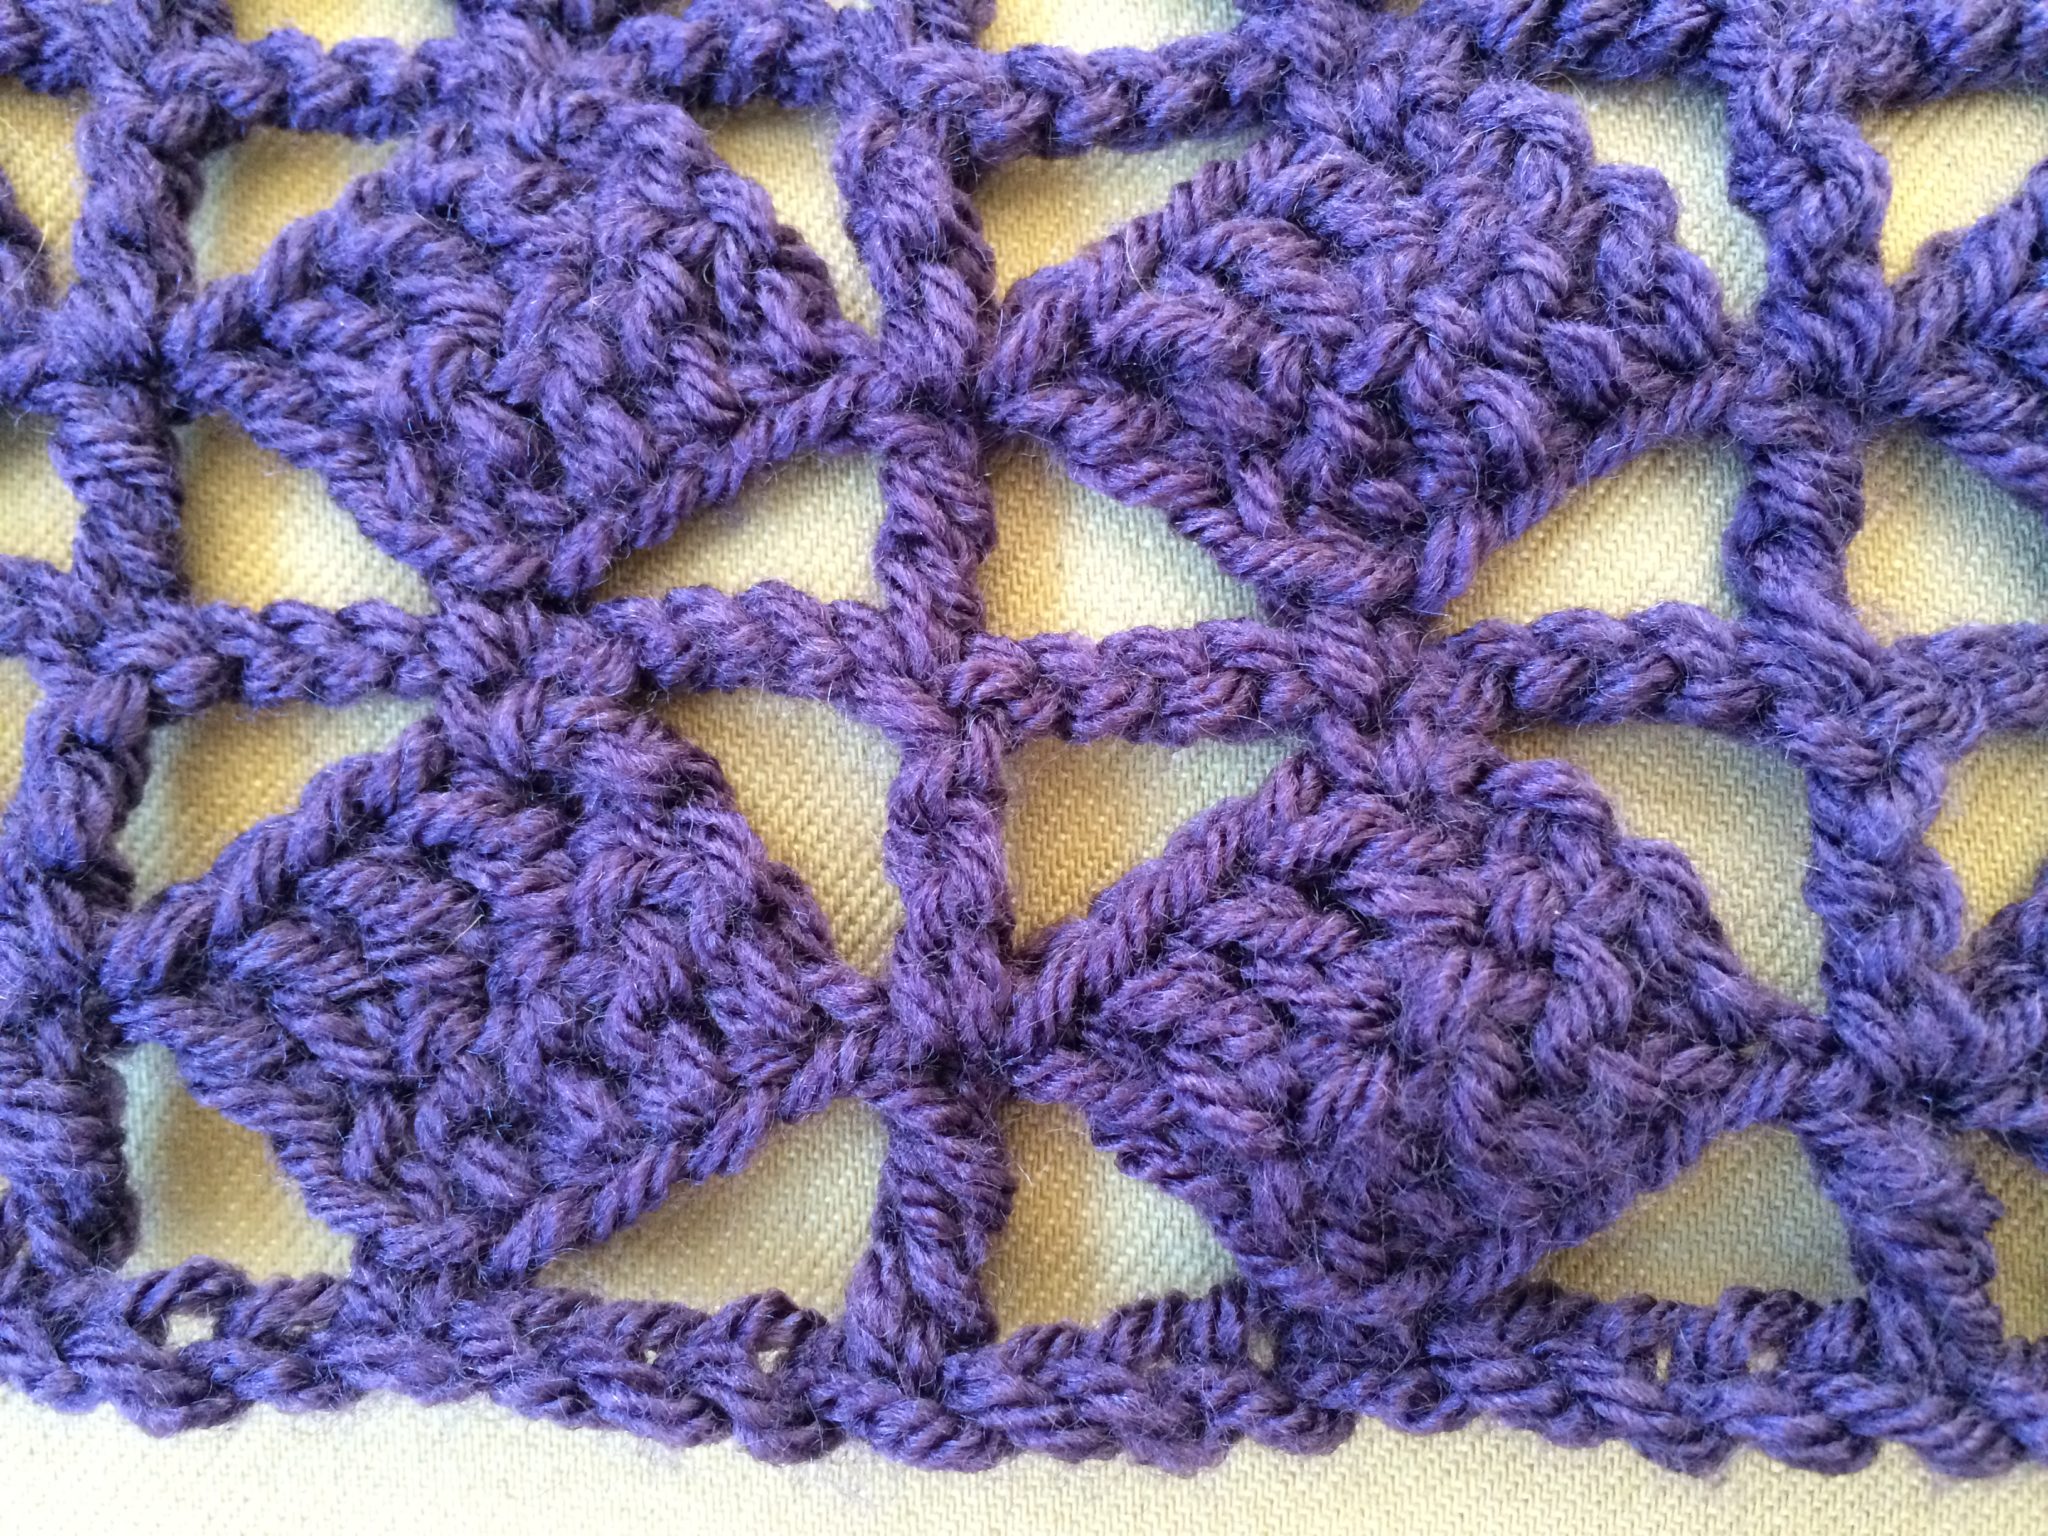
Discover the trellis crochet pattern which is an interesting stitch combination which is worked back and forth during the row.
The page you requested could not be found. Try refining your search, or use the navigation above to locate the post.
Author: Alison Heathcote – Published: January 2024
Finding a crochet pattern can be quite overwhelming with the multitude of options available. However, the real challenge lies in discovering patterns that not only meet your creative needs but also adhere to high-quality standards and technical accuracy.
This is precisely why I took the initiative to craft patterns that are not just perfect but tailored specifically for you. In creating these patterns, my aim is to provide a seamless and enjoyable crochet experience, ensuring that each detail is not only artistically inspiring but also technically precise.
We have crochet patterns in the following sections:
All my patterns are Old English Creations original designs created by our talented designer (me).
Each crochet pattern is technically correct and uses US crochet terminology and not UK crochet terminology.
Our patterns are sold at my Etsy store.
You can print the crochet patterns them on paper and you can read them on your iPad or phone. By purchasing any Old English Creations patterns from our Etsy store, you are not buying a copy of a pattern; you’re buying far more: a perpetual single-user licencefor the pattern.
Your licence entitles you to:
Your licence is non-transferable and Old English Creations patterns may not be shared, passed on to others, resold, or redistributed in any other way.
My original patterns may not be reproduced by photocopy, posted on the web or sold without written permission from Old English Creations. However, you may sell the fabulous finished items you created from our patterns and in fact we hope you do. Please respect the craft and skill of the designer.

Pin this to read later.
Alison is a passionate crochet enthusiast and dedicated business blogger. She combines her love for crafting and entrepreneurship to inspire and connect with others.
With a knack for transforming yarn into beautiful creations and a flair for sharing valuable insights about running a successful crochet business, Alison embodies the perfect blend of creativity and practicality.
Read more about Alison’s crochet journey.
If you enjoyed this post and crochet is your thing, you may like some other crochet articles from our blog.
Author: Alison - Updated: November 2024 Crochet Basics Getting Started About Crochet Crochet is a vast subject. and you really need to know a few of the basics before you can really get into it. This post is just to go over a few of the basic points and in crochet...
Shawl and Wrap Shapes Wraps are rectangles and shawls are triangles. This is the general consensus. You can get semi-circle wraps as well. But in this post I'm discussing the structure of crocheted triangles. Triangles A triangle has three sides and three...
Author: Alison - Updated: February 2025 Repetitive Actions and the Comfort They Bring The Power of Repetition It Begins Repetition is a fundamental part of our human experience. From an early age, we find solace in familiar patterns. As children, we beg to hear the...
Author: Alison Heathcote – Published: April 2013 – Revised: January 2024
Crochet is a wonderful activity that can provide relaxation, mindfulness, and creativity, making it an ideal addition to your daily self-care routine. Whether you are a beginner or an experienced crocheter, incorporating crochet into your daily routine can be a great way to take care of yourself and improve your overall well-being.
The repetitive nature of crocheting, like other meditative arts, has a soothing effect on the mind. It provides a rhythmic, tactile experience, which can be deeply calming. Creating with your hands can be a powerful way to soothe the mind and calm the spirit.
For someone like you, who enjoys art and finds solace in meditative activities, crochet can be a wonderful outlet. Let’s explore how this craft can help ease stress.
Creating art, like crochet, is a fantastic way to relieve stress and find calmness. When you use crochet as a meditative art form, it can work wonders for your well-being. Crocheting is especially helpful if you are a beginner artist who loves color and is looking for a creative outlet.
Crochet is an excellent way to reduce stress and anxiety. When you crochet, you are engaging in a repetitive motion that can be very soothing and calming to the mind and body. This can help to reduce feelings of tension and worry and promote a sense of relaxation and calmness.
By incorporating crochet into your daily self-care routine, you can carve out some time for yourself each day to unwind and de-stress.
Crochet can also be a very meditative activity. Crocheting is a form of meditative art. It allows you to focus on the rhythmic motions of looping yarn through loops, creating a repetitive and calming motion. This rhythmic action can induce a state of flow, where you become fully absorbed in the process. This absorption redirects your attention away from stressors, providing a mental break and creating a sense of calm.
When you crochet, you must focus your attention on the task at hand, which can help to quiet your mind and bring you into the present moment. This can be especially helpful if you struggle with racing thoughts or a tendency to ruminate on the past or worry about the future.
The process of crochet also encourages mindfulness. It invites you to be present in each stitch, each loop, and each pattern. This mindfulness practice can have a positive impact on your overall well-being. It promotes relaxation, reduces anxiety, and enhances your ability to cope with stress. By practicing mindfulness through crochet, you can develop a greater sense of awareness and presence, which can help you to feel more grounded and centered.
The simplicity of crochet can be a comfort. With just a hook and some yarn, you have the power to create intricate patterns or simple designs. This simplicity can be a relief from the complexities of daily life. It offers a sense of control and accomplishment, as you see your creation grow from a ball of yarn into something tangible and beautiful.
One of the reasons crochet is great for stress reduction is that it demands your focus. When you start a project, you select your colors and stitches, and then you work through each row.
This process keeps your mind occupied, helping you let go of daily worries. As an aspiring artist, it’s an ideal way to begin your creative journey.
Moreover, crochet is a tactile experience. The feel of the yarn in your hands, the gentle pull and release of the hook, can be grounding. It connects you to the present moment, providing a sensory experience that can be deeply soothing. The tactile nature of crochet is also incredibly soothing.
Running the yarn through your fingers and creating stitches with the hook is a tactile experience that connects you to the here and now. This physical engagement with the craft can serve as a grounding practice, helping you stay in the present moment. The texture of the yarn, whether soft or textured, can also offer a comforting sensation.
Another great benefit of incorporating crochet into your daily self-care routine is that it can provide a sense of accomplishment and satisfaction. When you complete a crochet project, you can take pride in your work and feel a sense of achievement. This can be especially important if you are feeling stuck or unproductive in other areas of your life.
By setting small goals for yourself through crochet, you can build your confidence and motivation, which can help you to tackle other challenges in your life. Completing a crochet project is a powerful mood booster. Whether you make a cozy blanket, a vibrant scarf, or even intricate amigurumi creatures, you get to see the real results of your efforts. This feeling of achievement can boost your self-esteem and provide a sense of purpose, making you feel more positive and less stressed.
Crocheting can also be a social activity, which adds an extra layer of stress reduction. Joining a crochet group or sharing your work online can connect you with a community of like-minded individuals.
This sense of belonging and camaraderie can be particularly helpful in times of stress. It’s an opportunity to share your passion for crochet, exchange tips, and find support from others who appreciate the meditative quality of this art form.
If you are looking to incorporate crochet into your daily self-care routine, here are a few tips and tricks that can help you to get started.
First, it’s important to find a quiet and comfortable space where you can focus on your crochet. This might be a cozy corner of your home, a quiet park, or a local coffee shop. Whatever space you choose, make sure it feels calm and peaceful, and that you have everything you need on hand (such as yarn, hooks, and any patterns or instructions).
It can also be helpful to set aside a specific time each day for your crochet practice. This could be in the morning before work, during your lunch break, or in the evening before bed. By making crochet a regular part of your routine, you can build the habit and make it a consistent form of self-care.
Experiment and try new things with your crochet practice. This could mean trying out new patterns or techniques, experimenting with different types of yarn, or even using crochet to make gifts for others. The more you explore and play with crochet, the more you can reap the benefits of this wonderful activity for your self-care.

Incorporating crochet into your routine can be a valuable tool for self-care. Taking even a short time each day to engage in this meditative art form can help you unwind, recharge, and find a sense of balance. It’s a gentle and caring way to nurture your creative spirit and prioritize your mental well-being.
Crochet is a wonderful way to reduce stress, cultivate mindfulness, and boost your sense of achievement and satisfaction. By setting aside time each day for crochet, you can make this activity a regular part of your routine and reap the benefits for your overall well-being. It offers a calming, meditative experience that can take your mind off worries.
The choice of colors allows you to create pieces that resonate with your emotions, and the tactile nature of crochet grounds you in the present moment. The sense of accomplishment and the potential for social connection make crochet an excellent choice for aspiring artists who love color and seek a stress-relieving hobby.
Remember, there is no rush with crochet. Take your time, savor each stitch, and let the process be as enjoyable as the finished piece. Allow crochet to be a sanctuary where you can find solace and peace amidst the busyness of life.
Select your favorite yarn, find a cozy spot and enjoy the many benefits of this calming and creative practice and start crocheting your stress away, one colorful stitch at a time.

Pin this to read later.

Alison is a passionate crochet enthusiast and dedicated business blogger. She combines her love for crafting and entrepreneurship to inspire and connect with others.
With a knack for transforming yarn into beautiful creations and a flair for sharing valuable insights about running a successful crochet business, Alison embodies the perfect blend of creativity and practicality.
Read more about Alison’s crochet journey.
If you enjoyed this post and crochet is your thing, you may like some other crochet articles from our blog.

"The Calm Crochet" Newsletter Welcome to the Calm Crocheter Discover the art of crochet as self-care. At Old English Creations, we believe that crochet is more than a craft—it's a soothing ritual that nurtures your mind and spirit. Our Calm Crocheter newsletter is...
Author: Alison Heathcote - Latest revision: January 2025 What is a Temperature Blanket? Practical Significance A crochet temperature blanket is a beautiful and creative way to capture the changing temperatures throughout a specific year and location. Imagine, you...
The war between knitters and crocheters continues unabated. If you are not a knitter or a crocheter you may not be aware of the subtle war that rages on in parlours and coffee shops across the land. I was chatting with my friend Nicole at Canadian Frost Apparel the...
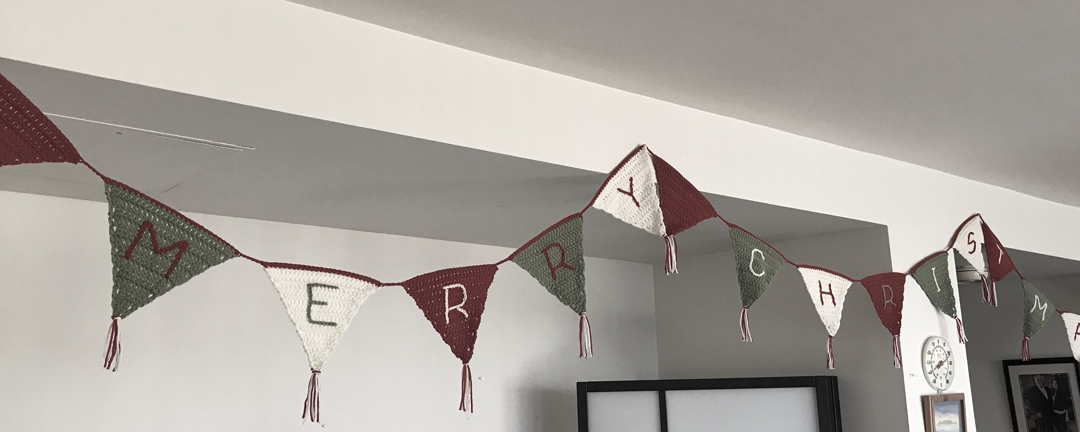
You will love to create this gorgeous Merry Christmas decoration for your home.
I’m going to share with you my original pattern for a Merry Christmas crocheted garland or bunting which you can craft ahead of time as part of your seasonal decorations.
A pennant is a small triangular flag.
In this pattern you make seventeen pennants and hang them on a bunting line.
You can create this project in a variety of colours as well for other occasions
I used acrylic yarn size [4] worsted weight by Impeccable. Get this yarn here.
You will need one ball in red, one ball in green and one ball in white.
The specific colours I used for my bunting are ruby red, sage green and ivory.
5mm crochet hook. Get this hook here.
Tapestry needle. Get a similar needle here.
Each pennant measures 20cm (8 inches) wide, 19cm (7 ½ inches) high and 22cm (8 ¾ inches) along the two long sides of the triangle.
Approximately 14 stitches and 8 rows to 10cm x 10cm (4 inches x 4 inches).
The full bunting chain, including the end loops, measures approximately 4 meters or just over 13 feet long.
I have made a video about making the Christmas Bunting and you can watch it on YouTube by clicking the video below.
Make the pennants first.
This pattern starts at the bottom point of the triangle and works up by increasing two stitches at second stitch in from the end of each row for 13 rows.
When all the pennants are made you can embroider each letter of the words with an easy chain stitch.
The bunting cord is crafted with a chain stitch with a small loop at each end with which to hang your bunting.
Add the tassels at the end.
This pattern uses USA or Canadian crochet stitch notation or terminology.
This means that a double crochet (dc) is made as follows:
Yarn over, and insert the hook, pull through (three loops on hook), yarn over and pull through next two loops on your hook (two loops on hook), yarn over and pull through the last two loops on your hook.
Only one loop remains on your hook and the double crochet stitch is complete.
ch = chain stitch
sc = single crochet
dc = double crochet
st = stitch
sl st = slip stitch
Make 17.
Row 1: With a slip stitch on your hook, chain 3, 2dc into first into slip stitch. (3sts)
Row 2: Ch3 as 1st st, 3dc into next stitch, 1dc into end stitch. (5 sts)
Row 3: Ch3 as 1st st, 2dc into next st, 1dc into next st, 2dc into next st, 1dc into end stitch. (7 sts)
Row 4: Ch3 as 1st st, 2dc into next st, 1dc into next 3 sts, 2dc into next st, 1dc into end stitch. (9 sts)
Row 5: Ch3 as 1st st, 2dc into next st, 1dc into next 5 sts, 2dc into next st, 1dc into end stitch. (11 sts)
Row 6: Ch3 as 1st st, 2dc into next st, 1dc into next 7 sts, 2dc into next st, 1dc into end stitch. (13 sts)
Row 7: Ch3 as 1st st, 2dc into next st, 1dc into next 9 sts, 2dc into next st, 1dc into end stitch. (15 sts)
Row 8: Ch3 as 1st st, 2dc into next st, 1dc into next 11 sts, 2dc into next st, 1dc into end stitch. (17 sts)
Row 9: Ch3 as 1st st, 2dc into next st, 1dc into next 13 sts, 2dc into next st, 1dc into end stitch. (19 sts)
Row 10: Ch3 as 1st st, 2dc into next st, 1dc into next 15 sts, 2dc into next st, 1dc into end stitch. (21 sts)
Row 11: Ch3 as 1st st, 2dc into next st, 1dc into next 17 sts, 2dc into next st, 1dc into end stitch. (23 sts)
Row 12: Ch3 as 1st st, 2dc into next st, 1dc into next 19 sts, 2dc into next st, 1dc into end stitch. (25 sts)
Row 13: Ch3 as 1st st, 2dc into next st, 1dc into next 21 sts, 2dc into next st, 1dc into end stitch. (27 sts)
Fasten off. Weave in ends.
Make 17 pennants in total. 6 red, 5 green and 6 white.

On 14 pennants embroider the capital letters:
M E R R Y C H R I S T M A S
Leave three pennants blank.
With a tapestry needle and contrasting yarn embroider each letter.
Align your letters from row 6 to row 11. Try to place the letters in the middle and do not pull too hard.
The letter M will be wider than all the other letters being 9 stitches across whereas the other letters will be 7 stitches across and the “I” only 3 stitches wide.
Keep the embroidery chain stitch at an even tension.
Here are the photos of each pennant I made showing the embroidery chain stitch letters to help you as a guide.


With red, ch10, and sl st into the first chain to form a loop. Chain 10.
Single crochet across the top 27 stitches of the first pennant.
Chain 5 for the gap.
Join the next pennant.
Make sure the pennants are added in the correct order to spell the words “_MERRY_CHRISTMAS_” with a blank pennant at the front, a blank pennant between the two words and a blank pennant at the end.
After the last pennant is joined, ch20 and slip stitch into the 10th chain from the hook to form a loop.
Fasten off. Weave in the ends.

Here are the photos of the two end pennants.
They show the 10 chain loops with which to hang your bunting.


The tassels hang at the point of each pennant. Cut four strands of yarn, two strands of red and two strands of white, 20cm (8 inches) long.
Fold in the middle.
I ran out of green and so I only used red and white.
Right side facing, from behind, insert your hook into the base point of a pennant and pull the folded loop of the 4 strands through for about 2cm, then pull the rest of the loose strands through the folded loops.
Gently ease the tassel into place.
Repeat on every pennant.
Slightly trim the tassels with sharp scissors if necessary.


If you loved using this original designed pattern, help us grow.
Please promote, like, and share with photos of your finished items.
Use the hashtag #OECpattern.
We would love to see your completed creations.
You may sell the finished items you create from this pattern.
By purchasing (or being gifted) any Old English Creations patterns, you are not just buying (or receiving) a copy of a pattern, you are getting far more, a perpetual single-user license for the pattern.
Your single-user license entitles you to:
Your license is non-transferable.
Old English Creations patterns may not be shared, passed on to others, re-sold, or redistributed in any other way.
If your friend needs one of our patterns, please ask them to download their own copy.
This original pattern may not be reproduced by photocopy, posted on the web or sold without written permission from Old English Creations.
Please respect the craft of the artist.
Alison Heathcote, a passionate crochet enthusiast and dedicated business blogger, combines her love for crafting and entrepreneurship to inspire and connect with others.
With a knack for transforming yarn into beautiful creations and a flair for sharing valuable insights about running a successful crochet business, Alison embodies the perfect blend of creativity and practicality.
If you enjoyed this post and crochet is your thing, you may like some other crochet articles from our blog.
Author: Alison - Updated: February 2025 Repetitive Actions and the Comfort They Bring The Power of Repetition It Begins Repetition is a fundamental part of our human experience. From an early age, we find solace in familiar patterns. As children, we beg to hear the...
Author: Alison - Updated: February 2025 Repetitive Actions and the Comfort They Bring The Power of Repetition It Begins Repetition is a fundamental part of our human experience. From an early age, we find solace in familiar patterns. As children, we beg to hear the...
Author: Alison Heathcote - Published: April 2013 - Revised: January 2024 Crochet for Self-care Crochet is a wonderful activity that can provide relaxation, mindfulness, and creativity, making it an ideal addition to your daily self-care routine. Whether you...
Your first sale is defined as the one where you sell a hand-made crocheted item to someone you have never met.
When you make your first sale it is one of the five steps towards building your prosperous crochet business.
That initial sale can be the hardest things to do or you can fall into it naturally.
Below I share with you the story of my first crochet sale which was the one that started the ball rolling so to speak.
We lived in a small town outside a large city which was about a thirty minute drive in the car. It was a seaside town and had two little shopping malls. Each mall had several line shops and one large supermarket.
In the Bayside Mall was a small wool and craft shop. This was a convenient place for me to get my yarns and crocheting supplies.
At that time I had just given birth to our fourth child, a daughter, and I was at home for several months looking after her. The two older children were at elementary school and the third child was a toddler at home with me all day. My husband was at work.
My days as a housewife were typical and there were many chores to be done each day. I organized my life so that I only left the house on a Friday to run errands and to buy the weekly groceries and Friday was my “day out.”
Because I was at home so much of the time I picked up crocheting again and began to make soft jerseys and tops for the children. My patterns were simple squares for fronts and backs and the sleeves were again straightforward with a slight increase at the shoulder. Over time I developed these patterns into complicated top-down no-seam garments as well.
I bought the wool from my local yarn store and it was usually 4ply on a 3.5mm hook. I used pastels for the girls and primaries for my boy.
By visiting the yarn store each Friday to buy more wool and because I took the two younger children in their newly made tops the store owner Shirley started to chat with me about the wool and the patterns I had used for the kid’s jerseys.
I explained that I only ever used my own patterns for items that I made. She asked me if I would crochet her a cardigan for which she would give me the yarn and the pattern from a magazine that she wanted to be made for herself.
You see, she was a knitter and not a crocheter, but she had found a lovely lacy white summer three-quarter length cardigan that she wanted to be made, but she could not crochet it herself.
Well, of course I would do it, why not?
I duly took the white light yarn and the pattern and said, “See you next Friday.”
At home that evening I started to make her pattern and it went really well. I have always been a firm tension crocheter and so could crochet to gauge. In that week I completed her garment and sewed it together.
I folded it neatly in tissue paper and wrapped a ribbon around it to make it look nice for her.
During that week I couldn’t work on my own creations and I did feel that, but the challenge of a lacy pattern kept me interested in the project.
Friday came around and I took the cardigan into the shop for Shirley. She was really pleased and put it on immediately. It fit her well and looked just like the image in the pattern book.
I was pleased that she was pleased. I mean, you never know…
She paid me $5 per ball that was made-up . The cardigan took five balls which came to $25 in all. I was excited about that. I saw it as bonus money for our family.
Shirley and I started chatting about yarns and crafts in general and then she said that if I had items that were already made-up she would put them in her window to sell. At that time she had some booties and other baby knitted items in her window but she had no crocheted goodies.
She wanted little blankets and baby items to promote the yarns that she sold. Her shop window was not big and in fact was quite small but well suited a yarn shop.
The deal was that I had to buy the yarns from her for the items she would sell in her window and I set the price and she took half. This was a good deal as I was buying wool from her anyway, and I was crocheting anyway, but now I had a chance to make some cash for the work.
I went home with new wool and a blanket pattern forming in my head. Because I’d done baby blankets before I knew about the colours that sell so I had a soft baby blue, white and a dark navy contrasting ball and well.
Over the next week I made a blanket for a baby boy in blue stripes. It was simple and a generous size. At the weekend I visited the shop again and she was pleased with the result. Shirley felt the quality of stitches and the regular tension was good and she loved the colour combinations.
I told her my price was $50 and she agreed we would split it fifty-fifty each. She must have put it in the window for the Saturday shoppers as it sold the next week. I arrived back on the next Friday and was excited to have sold my blanket. My first item to a stranger. My first crochet original design blanket. For cash. This was good.
She told me the woman who bought it was a crocheter herself but did not have time to make something ‘handmade’ for her new niece, but that she would pass it off as her own work!
Amazing!
That other crocheters would buy my goods and say it was their own (not that I cared what they did or said) but suddenly I saw a market for my goods, to women who knew how to crochet and were known for their crocheting, but had no time to do it. The perfect customer.
That was my first sale.
I sold a blanket, through the wool shop, to a customer I had not met, for cash.
Since that time I have sold many more garments, blankets, bags and other things although I still remember the feeling of that first sale.

Alison Heathcote, a passionate crochet enthusiast and dedicated business blogger, combines her love for crafting and entrepreneurship to inspire and connect with others.
With a knack for transforming yarn into beautiful creations and a flair for sharing valuable insights about running a successful crochet business, Alison embodies the perfect blend of creativity and practicality.
If you enjoyed this post and crochet is your thing, you may like some other crochet articles from our blog.
Author: Alison - Updated: February 2025 Repetitive Actions and the Comfort They Bring The Power of Repetition It Begins Repetition is a fundamental part of our human experience. From an early age, we find solace in familiar patterns. As children, we beg to hear the...
Shawl and Wrap Shapes Wraps are rectangles and shawls are triangles. This is the general consensus. You can get semi-circle wraps as well. But in this post I'm discussing the structure of crocheted triangles. Triangles A triangle has three sides and three...
Making Space for Crochet Special Places I have a cherished spot in my home that's dedicated to my crocheting. It's where I spend a lot of my creative time. At any given moment, you'll find me working on at least two crochet projects. One of them is usually a...
Crochet and sustainability have a natural intersection, as this craft involves creating beautiful and useful items from yarn, a renewable and versatile material. Eco-friendly self-care involves taking care of oneself while also considering the impact that our actions have on the planet. By incorporating sustainable crochet practices into our daily self-care routines, we can not only improve our own well-being but also reduce our environmental impact.
One way to practice sustainable crochet is to choose eco-friendly yarns. Many companies now offer yarns that are made from sustainable materials such as organic cotton, bamboo, hemp, and even recycled fibers. These yarns are produced with less harm to the environment, and choosing them can support sustainable agriculture, reduce the use of pesticides and chemicals, and decrease the amount of waste that ends up in landfills.
Another way to practice sustainable crochet is to use natural dyes. Natural dyes can be created from plants, flowers, and even food waste. Not only are they better for the environment than synthetic dyes, but they can also create beautiful and unique colors. Experimenting with natural dyeing can be a fun and rewarding way to add a sustainable element to your crochet practice.
In addition to choosing eco-friendly materials and practices, sustainable crochet also involves using your crochet skills to create items that are useful, long-lasting, and reduce waste. For example, instead of buying single-use items such as plastic bags or paper towels, you can create reusable alternatives through crochet. You can also repurpose materials such as old t-shirts or sheets to create yarn and use them in your crochet projects. By finding creative ways to reuse and repurpose materials, you can reduce waste and contribute to a more sustainable lifestyle.
Furthermore, crochet can also be used to create items that serve a specific purpose in reducing environmental impact. For example, you can crochet produce bags to use at the grocery store instead of using plastic bags. You can also crochet dishcloths or cleaning cloths to replace disposable sponges or paper towels. These items are not only sustainable but also functional and beautiful.
Incorporating sustainable crochet practices into your daily self-care routine can also have a positive impact on your mental health. Sustainable crochet can be a form of mindfulness, as it requires focus, patience, and creativity. By taking the time to create something with your own hands, you can feel a sense of accomplishment and pride, which can boost your self-esteem and overall well-being. Additionally, by contributing to a more sustainable lifestyle, you can feel a sense of purpose and fulfillment, which can also improve your mental health.
In conclusion, sustainable crochet is an excellent way to practice eco-friendly self-care while also engaging in a creative and rewarding activity. By choosing eco-friendly materials and practices, creating items that reduce waste, and contributing to a more sustainable lifestyle, you can make a positive impact on the planet while also taking care of yourself. So grab your hooks, choose some sustainable yarns, and let your creativity flow!

Alison is a passionate crochet enthusiast and dedicated business blogger. She combines her love for crafting and entrepreneurship to inspire and connect with others.
With a knack for transforming yarn into beautiful creations and a flair for sharing valuable insights about running a successful crochet business, Alison embodies the perfect blend of creativity and practicality.
Read more about Alison’s crochet journey.
If you enjoyed this post and crochet is your thing, you may like some other crochet articles from our blog.
The page you requested could not be found. Try refining your search, or use the navigation above to locate the post.
The page you requested could not be found. Try refining your search, or use the navigation above to locate the post.
The page you requested could not be found. Try refining your search, or use the navigation above to locate the post.
27th November every year is Lancashire Day.
Lancashire is a county in the north west of England.
This special day is celebrated by men and women and lassies from Lancashire who may or may not still live there.
Like me.
I am originally from Lancashire but I now live in Vancouver.
The sign says “Welcome to Lancashire A place where everyone natters” which is a twist on the saying everyone matters, because to natter is to chat (and maybe even gossip) especially with your friends and neighbours.
But in a friendly way, as people do in the north.
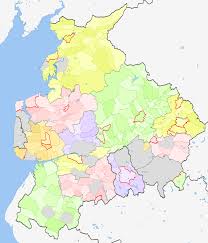
Lancashire
Nostalgia is a funny thing and draws you back to your roots and early childhood memories.
I haven’t been there for many years but still remember living as a child in a carefree environment walking the fields and picking blackberries each endless summer.
It was on 27th November 1295 when the county first sent its representatives to the English Parliament.
That was over seven hundred years ago and this date is now celebrated as Lancashire Day

This is the symbol for Lancaster and comes from the War of the Roses. For years Lancaster was the county town but now it is Preston.
As you can see it is the icon for Old English Creations and I have it as my favicon as well. Not got much to do with crochet but more of a backstory piece.
The white rose is for York and Yorkshire. You know, where the puddings come from, so no white roses.
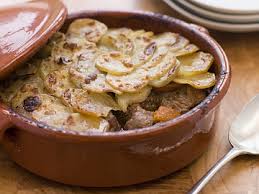 Cook my Nana’s Lancashire Hot Pot
This is my grandmother’s recipe and we used to have it once a week as kids.
Lancashire Hot Pot is a casserole like meal prepared in one dish that can be kept warm for people coming home late.
It is made with the local ingredients from the area and is traditionally eaten on a weekday night.
It is a simple dish made from of lamb, onions, potatoes and sometimes turnips.
I haven’t made it for a while so the image is from wkkicommons free images
Your hot pot can be removed from the oven and kept warm to eat later in the day.
Serve with pickled red cabbage on the side.
She’s a lassie from Lancashire
Just a lassie from Lancashire.
She’s a lassie from Lancashire
Oh, so, dear.
Though she dresses in clogs and shawls,
She’s the prettiest of them all.
None could be rarer, or fairer, than Sarah,
The lassie from Lancashire.
Alison Heathcote, a passionate crochet enthusiast and dedicated business blogger, combines her love for crafting and entrepreneurship to inspire and connect with others.
With a knack for transforming yarn into beautiful creations and a flair for sharing valuable insights about running a successful crochet business, Alison embodies the perfect blend of creativity and practicality.
If you enjoyed this post and crochet is your thing, you may like some other crochet articles from our blog.
You will love to create this gorgeous Merry Christmas decoration for your home.
Shawl and Wrap Shapes Wraps are rectangles and shawls are triangles. This is the general consensus. You can get semi-circle wraps as well. But in this post I'm discussing the structure of crocheted triangles. Triangles A triangle has three sides and three...
Your Crochet Business: New Year Reset If you have a micro crochet business the New Year is always a good time to plan your growth and direction for your venture. It is at the turning points each year, and for most of us that is the start in January, that you can...