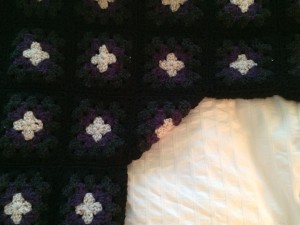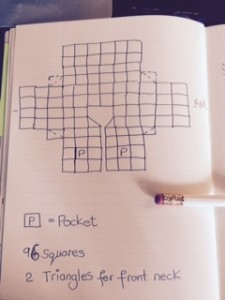
by Alison Stapleton Update number 3 on the Granny Jacket You can catch up on the basic granny square, and updates number 1 and update number 2 so you know where we are at. Finished jacket Here is the finished jacket with a border of five rows single crochet on...
Tudor Rose Granny
Inspiration
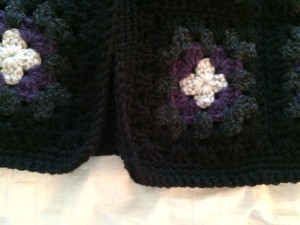
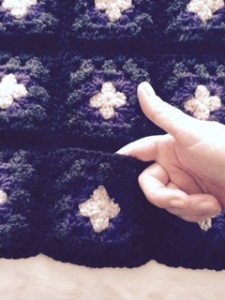
Our Tudor Rose granny square is a simple pattern that anyone can make.
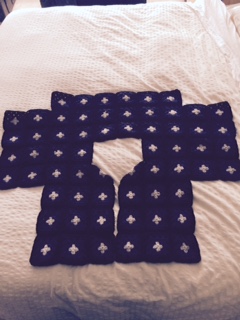
You can use our Tudor Rose granny for blankets or make them up into a bag.
You can also make regular four-round Grannies and place them in between the Tudor Rose Grannies.
War of the Roses
The War of the Roses was fought in England from 1455 to 1485.
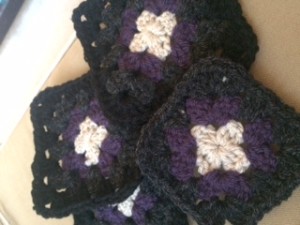
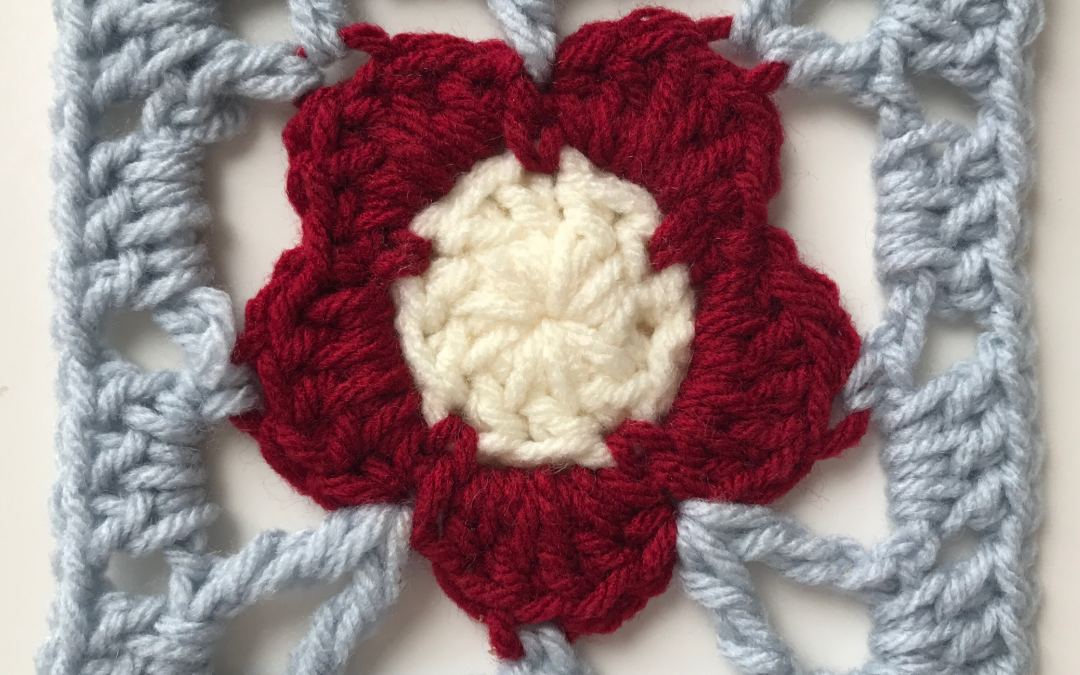
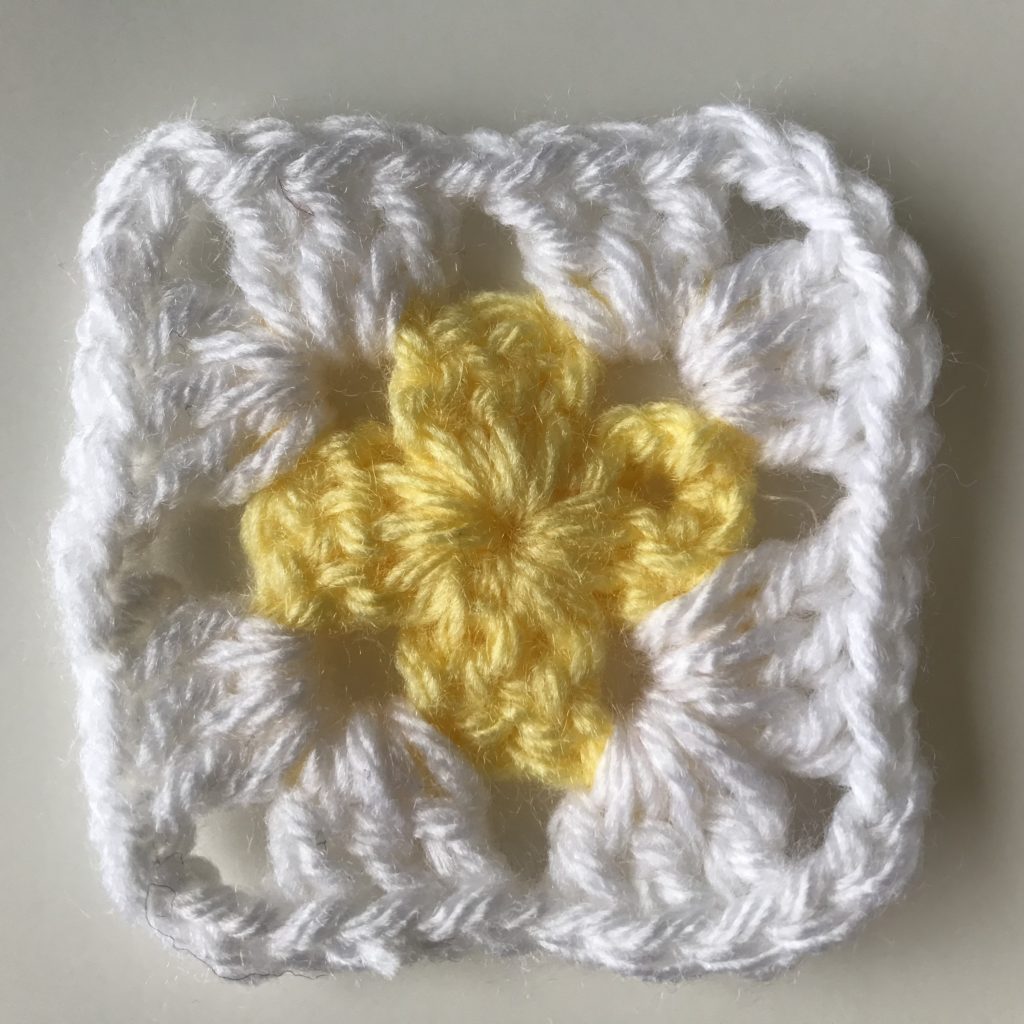
A Tudor Rose has white petals in the middle and red petals on the outside. It symbolizes the joining of two fighting opponents from the War of the Roses.
The white rose is for Yorkshire and the red rose is for Lancashire.
Typically, the Tudor rose is displayed with one petal below and has two petals at the top.


Symbolic
It was in the 1500’s when the Tudor Rose was first used in royal standards.
Roses in general are a symbol for Mary. You will often find rose windows in churches.

Pattern Design Notes
The challenge is to get a five-petaled rose into a four-sided square. This is achieved in two ways.
- Firstly, by using the long triple crochet stitch and stitching into the top of all the petals and only into some of the gaps between the petals.
- Secondly, by having two opposite sides with a four / six chain combination and two sides with a five / five chain combination. All sides equaling ten chains in all excluding other stitches.
Weave in the tail ends as you go to avoid much sewing at the finish.

Pattern Design Notes
The challenge is to get a five-petaled rose into a four-sided square. This is achieved in two ways.
- Firstly, by using the long triple crochet stitch and stitching into the top of all the petals and only into some of the gaps between the petals.
- Secondly, by having two opposite sides with a four / six chain combination and two sides with a five / five chain combination. All sides equaling ten chains in all excluding other stitches.
Tension Gauge
If your tension is loose, then use a slightly smaller hook.
If your tenson is tight, then used a slightly large hook
Measurements
Each Tudor Rose granny measures approximately 12cm x 12cm (4 ½ inches x 4 ½ inches).
Crochet Terminology
This pattern uses US crochet terminology.

Stitches Used
Chain = ch
Single crochet = sc.
Half double crochet = hdc.
Double crochet = dc.
Triple crochet – tc.
Slip stitch = sl.st.
Join in yarn.
Yarns
Impeccable medium weight [4] yarn.
A = white
B = red
C = blue

Hook
5mm crochet hook.

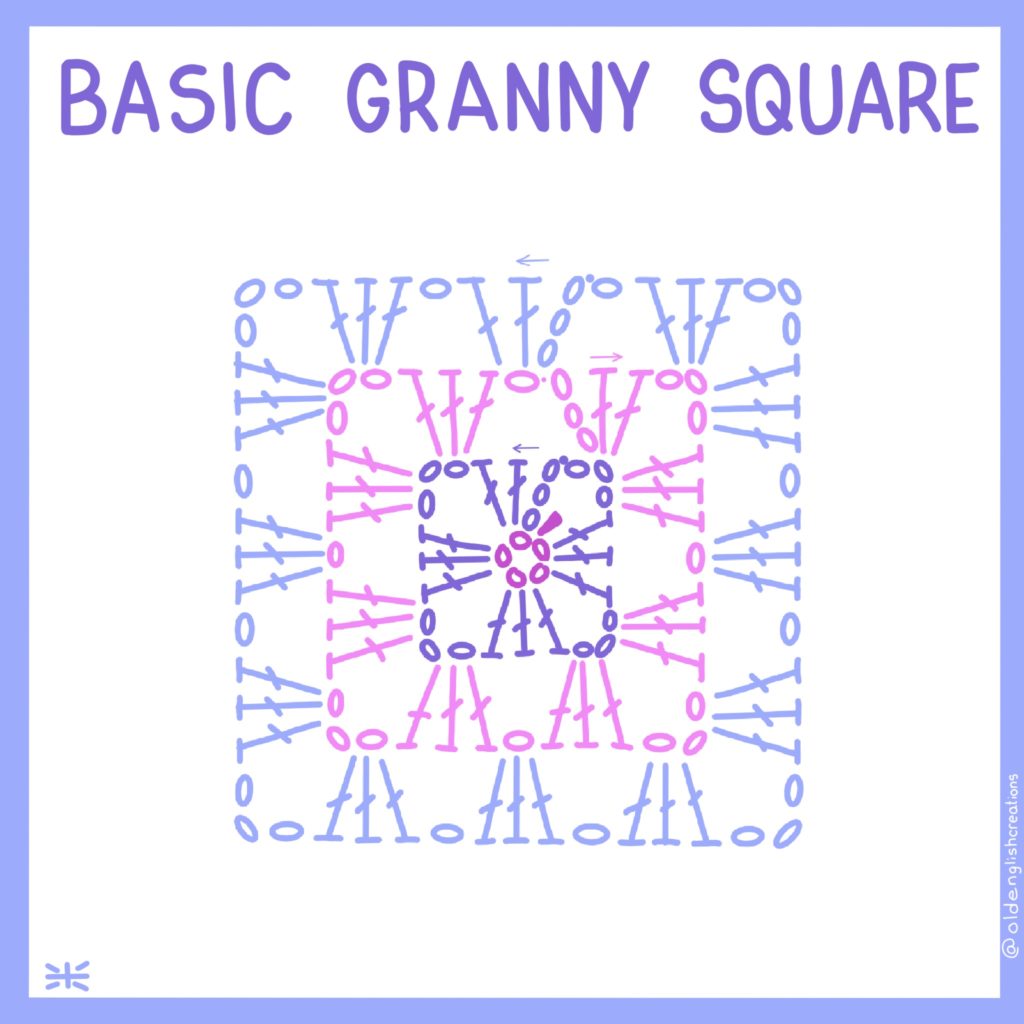
Pattern
Foundation chain ring: Ch5 join with a sl.st to form ring.
Round 1: With A (white), Ch3 (as 1st stitch), 9 dc into center ring join with sl.st. Fasten off. [10 sts].
Round 2: With B (red), join with sl.st., make loop [ch3, skip 2 sts, 1 sc], repeat 3 times, ch 3 sl.st. into 1st st. [5 loops].
Round 3: Make petals. Sl.st. forward into first loop, work into loop, 2ch (as 1st hdc), 3 dc, 1hdc, sl.st. into top of sc from round below, work into next loop, * 1hdc, 3 dc, 1hdc, sl.st. into top of sc from round below * repeat from * to * [3] times more. Fasten off. [5 petals].
Round 4: With C (blue), make a loop on your hook, hdc into a valley stitch between two petals. Ch5, 1dc into back loop of middle stitch of a petal, 3ch (1st corner), 1dc into same st. Ch6, sc into back loop of middle st of next petal, ch4, tc into valley stitch before next petal, ch3 (2nd corner), tc into same st, ch 5, sc into back loop of middle st of next petal, ch5, tc into stitch before next petal, ch3 (3rd corner), tc into same st, ch4, sc into back loop of middle st of next petal, ch6, dc into stitch before next petal, ch3 (4th corner), dc into same st, ch5, join with sl.st into top of 1st hdc in round.
Round 5: Sl.st into gap, ch3 (as 1st st), 2dc into gap, ch1, * into corner loop 3dc, ch3, 3dc, ch1, 3dc into next gap, ch1, 3dc into next gap, repeat *. Repeat from * to * twice more. Into corner loop 3dc, ch3, 3dc, [ch 1, 3dc into next gap], 1ch, join with sl.st. Fasten off.

Other Way to Use This Pattern
Tudor Rose Summer Tote
I used our Tudor Rose Granny square pattern to make a light summer tote which I ‘m calling the Tudor Rose Summer Tote.

Author Bio
Alison Heathcote, a passionate crochet enthusiast and dedicated business blogger, combines her love for crafting and entrepreneurship to inspire and connect with others.
With a knack for transforming yarn into beautiful creations and a flair for sharing valuable insights about running a successful crochet business, Alison embodies the perfect blend of creativity and practicality.
More Articles
If you enjoyed this post and crochet is your thing, you may like some other crochet articles from our blog.
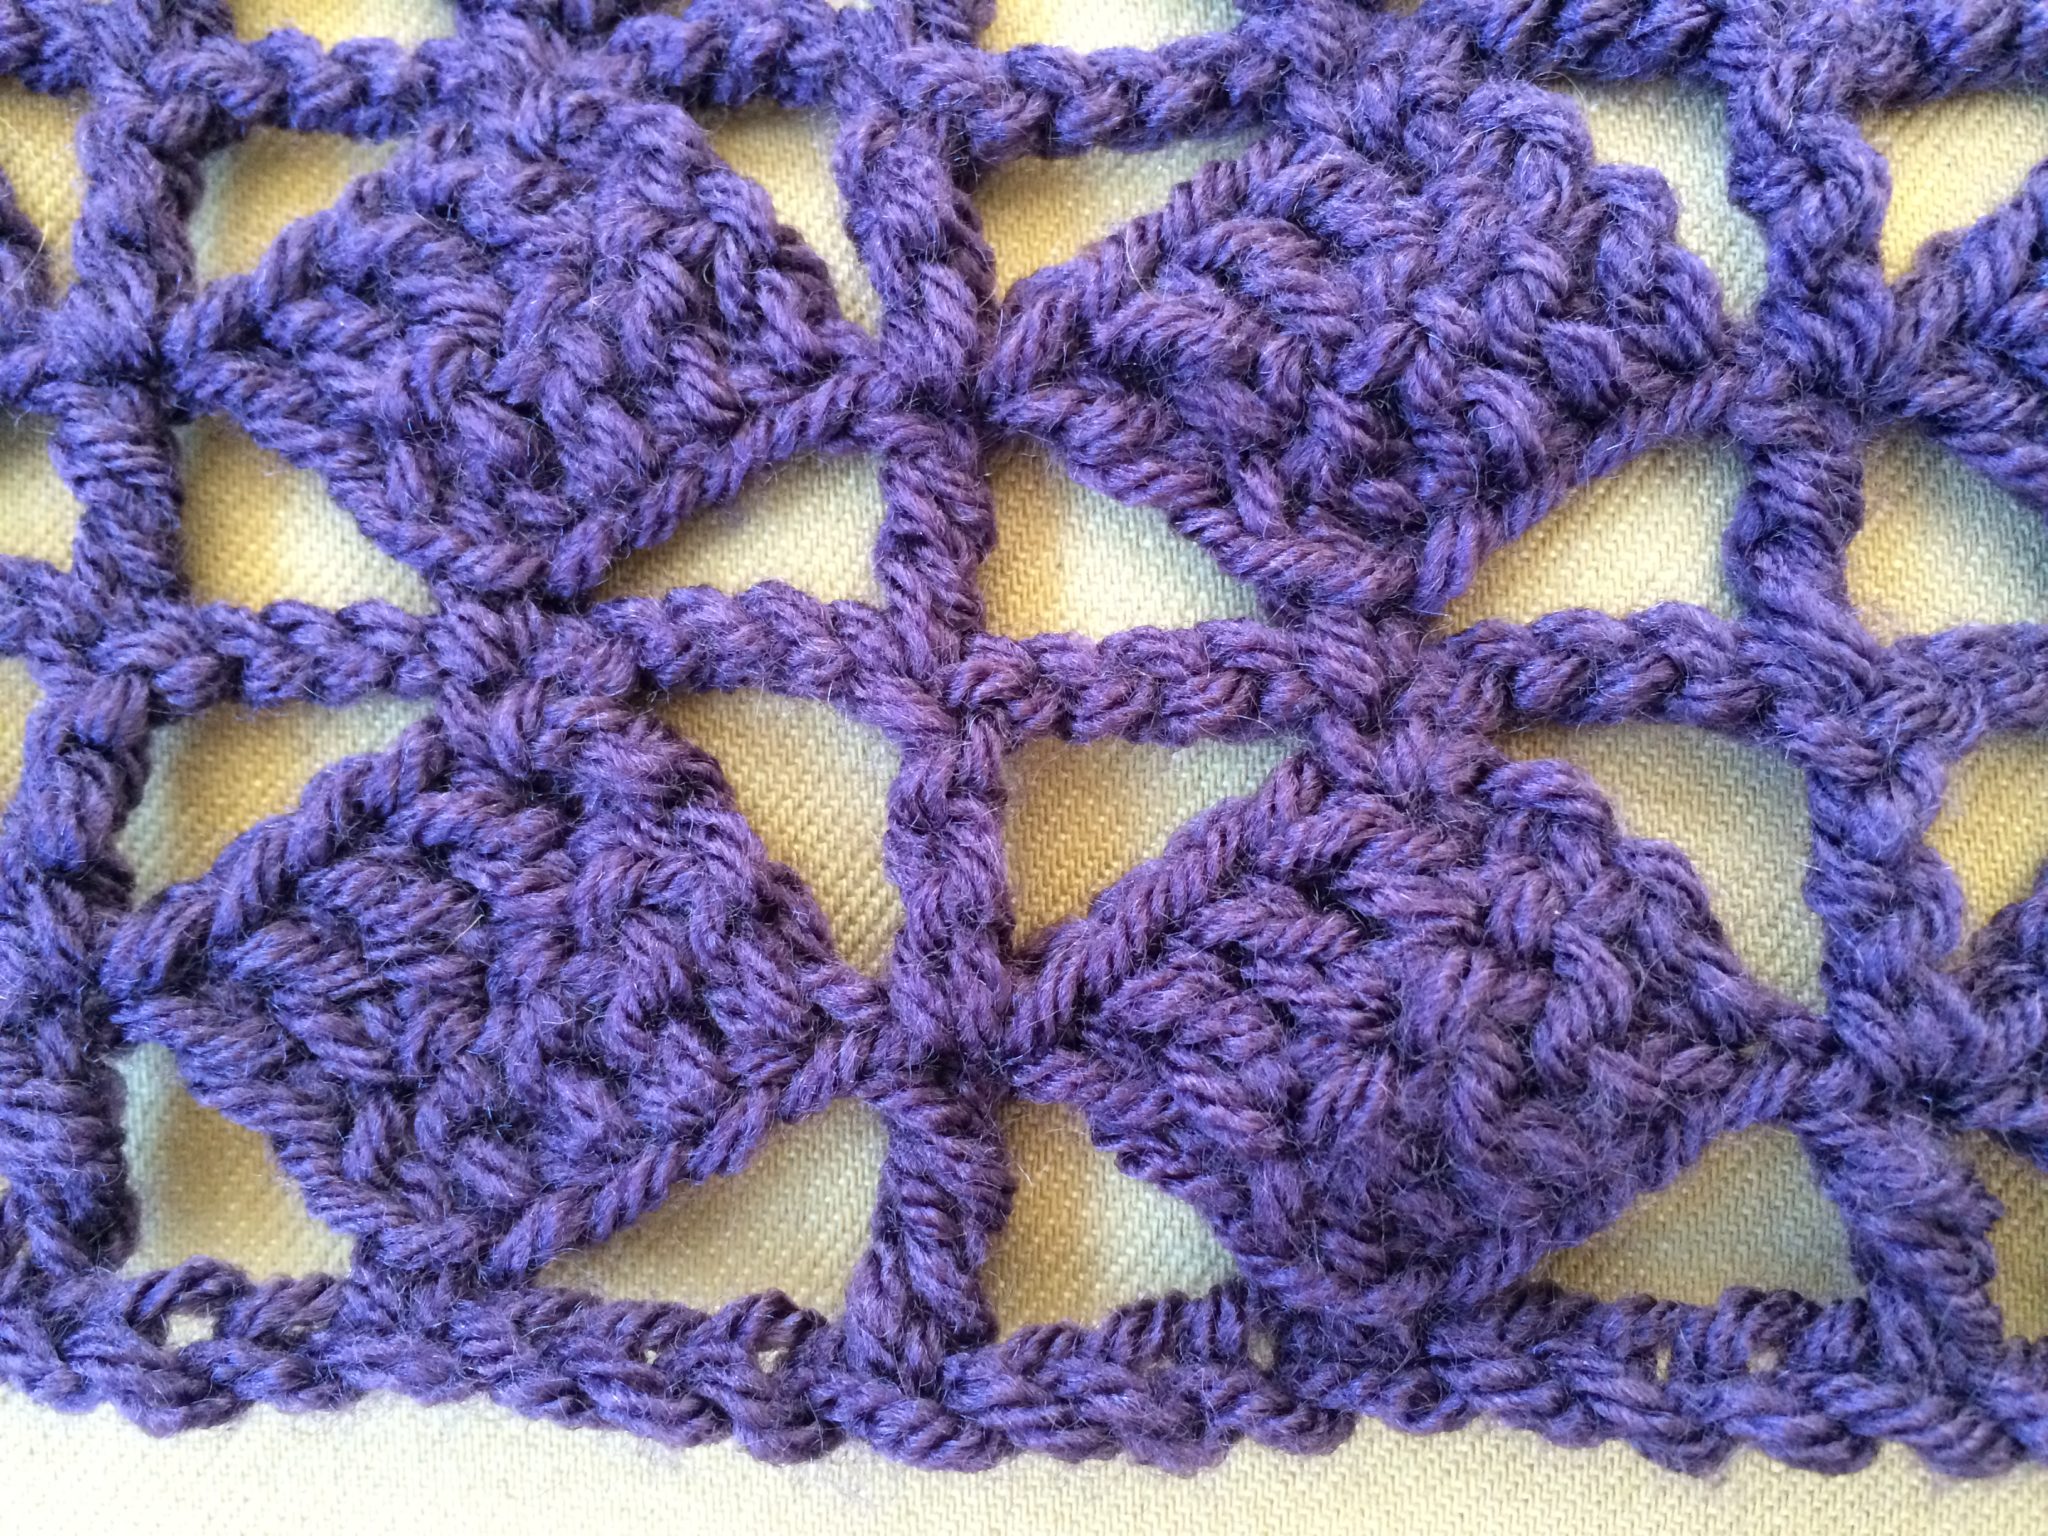
Trellis Pattern – Crochet Stitches
Discover the trellis crochet pattern which is an interesting stitch combination which is worked back and forth during the row.

Your Year in Crochet – A Review
Your End of Year Review As the year comes to an end it is a great time to see where you are in your crochet micro-business and do a review. Looking back over the highlights of your year can help you plan for the next twelve months. In December there are often many...