Author: Alison Heathcote - Published: January 2024 About Our Original Crochet Patterns Finding a crochet pattern can be quite overwhelming with the multitude of options available. However, the real challenge lies in discovering patterns that not only meet your...
Christmas Crochet Bunting Garland
Christmas Crochet Bunting
Inspiration
You will love to create this gorgeous Merry Christmas decoration for your home.
I’m going to share with you my original pattern for a Merry Christmas crocheted garland or bunting which you can craft ahead of time as part of your seasonal decorations.
Pennants
A pennant is a small triangular flag.
In this pattern you make seventeen pennants and hang them on a bunting line.
You can create this project in a variety of colours as well for other occasions
Materials
Yarn
I used acrylic yarn size [4] worsted weight by Impeccable. Get this yarn here.
You will need one ball in red, one ball in green and one ball in white.
The specific colours I used for my bunting are ruby red, sage green and ivory.
Hook
5mm crochet hook. Get this hook here.
Tapestry needle. Get a similar needle here.
Measurements
Pennant
Each pennant measures 20cm (8 inches) wide, 19cm (7 ½ inches) high and 22cm (8 ¾ inches) along the two long sides of the triangle.
Gauge
Approximately 14 stitches and 8 rows to 10cm x 10cm (4 inches x 4 inches).
Bunting
The full bunting chain, including the end loops, measures approximately 4 meters or just over 13 feet long.
Watch on YouTube
I have made a video about making the Christmas Bunting and you can watch it on YouTube by clicking the video below.
Pattern Notes – Construction Sequence
Pennants
Make the pennants first.
This pattern starts at the bottom point of the triangle and works up by increasing two stitches at second stitch in from the end of each row for 13 rows.
Embroidery
When all the pennants are made you can embroider each letter of the words with an easy chain stitch.
Bunting Cord
The bunting cord is crafted with a chain stitch with a small loop at each end with which to hang your bunting.
Tassels
Add the tassels at the end.
US Crochet Terminology
This pattern uses USA or Canadian crochet stitch notation or terminology.
This means that a double crochet (dc) is made as follows:
Yarn over, and insert the hook, pull through (three loops on hook), yarn over and pull through next two loops on your hook (two loops on hook), yarn over and pull through the last two loops on your hook.
Only one loop remains on your hook and the double crochet stitch is complete.
Stitches Used and Abbreviations
ch = chain stitch
sc = single crochet
dc = double crochet
st = stitch
sl st = slip stitch
Pennant Pattern
Make 17.
Row 1: With a slip stitch on your hook, chain 3, 2dc into first into slip stitch. (3sts)
Row 2: Ch3 as 1st st, 3dc into next stitch, 1dc into end stitch. (5 sts)
Row 3: Ch3 as 1st st, 2dc into next st, 1dc into next st, 2dc into next st, 1dc into end stitch. (7 sts)
Row 4: Ch3 as 1st st, 2dc into next st, 1dc into next 3 sts, 2dc into next st, 1dc into end stitch. (9 sts)
Row 5: Ch3 as 1st st, 2dc into next st, 1dc into next 5 sts, 2dc into next st, 1dc into end stitch. (11 sts)
Row 6: Ch3 as 1st st, 2dc into next st, 1dc into next 7 sts, 2dc into next st, 1dc into end stitch. (13 sts)
Row 7: Ch3 as 1st st, 2dc into next st, 1dc into next 9 sts, 2dc into next st, 1dc into end stitch. (15 sts)
Row 8: Ch3 as 1st st, 2dc into next st, 1dc into next 11 sts, 2dc into next st, 1dc into end stitch. (17 sts)
Row 9: Ch3 as 1st st, 2dc into next st, 1dc into next 13 sts, 2dc into next st, 1dc into end stitch. (19 sts)
Row 10: Ch3 as 1st st, 2dc into next st, 1dc into next 15 sts, 2dc into next st, 1dc into end stitch. (21 sts)
Row 11: Ch3 as 1st st, 2dc into next st, 1dc into next 17 sts, 2dc into next st, 1dc into end stitch. (23 sts)
Row 12: Ch3 as 1st st, 2dc into next st, 1dc into next 19 sts, 2dc into next st, 1dc into end stitch. (25 sts)
Row 13: Ch3 as 1st st, 2dc into next st, 1dc into next 21 sts, 2dc into next st, 1dc into end stitch. (27 sts)
Fasten off. Weave in ends.
Pennant Crochet Stitch Diagram
Color Combinations
Make 17 pennants in total. 6 red, 5 green and 6 white.

Embroider Letters
On 14 pennants embroider the capital letters:
M E R R Y C H R I S T M A S
Leave three pennants blank.
With a tapestry needle and contrasting yarn embroider each letter.
Align your letters from row 6 to row 11. Try to place the letters in the middle and do not pull too hard.
The letter M will be wider than all the other letters being 9 stitches across whereas the other letters will be 7 stitches across and the “I” only 3 stitches wide.
Keep the embroidery chain stitch at an even tension.
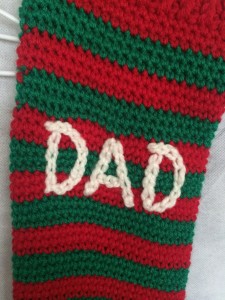
Embroidery Chain Stitch Examples
Letters
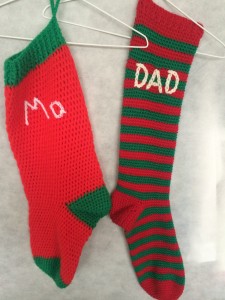
Here are the photos of each pennant I made showing the embroidery chain stitch letters to help you as a guide.


Bunting Cord Pattern
Starting Loop
With red, ch10, and sl st into the first chain to form a loop. Chain 10.
Join the Pennants
Single crochet across the top 27 stitches of the first pennant.
Gaps
Chain 5 for the gap.
Join the next pennant.
Note
Make sure the pennants are added in the correct order to spell the words “_MERRY_CHRISTMAS_” with a blank pennant at the front, a blank pennant between the two words and a blank pennant at the end.
Ending Loop
After the last pennant is joined, ch20 and slip stitch into the 10th chain from the hook to form a loop.
Fasten off. Weave in the ends.

End Loops
End Loops
Here are the photos of the two end pennants.
They show the 10 chain loops with which to hang your bunting.


Tassels
Make the Tassels
The tassels hang at the point of each pennant. Cut four strands of yarn, two strands of red and two strands of white, 20cm (8 inches) long.
Fold in the middle.
I ran out of green and so I only used red and white.
Join Tassels
Right side facing, from behind, insert your hook into the base point of a pennant and pull the folded loop of the 4 strands through for about 2cm, then pull the rest of the loose strands through the folded loops.
Gently ease the tassel into place.
Repeat on every pennant.
Slightly trim the tassels with sharp scissors if necessary.


How to Use Our Patterns
Share The Love
If you loved using this original designed pattern, help us grow.
Please promote, like, and share with photos of your finished items.
Use the hashtag #OECpattern.
We would love to see your completed creations.
Terms of Use
You may sell the finished items you create from this pattern.
By purchasing (or being gifted) any Old English Creations patterns, you are not just buying (or receiving) a copy of a pattern, you are getting far more, a perpetual single-user license for the pattern.
Your single-user license entitles you to:
- Unlimited customer support from the pattern designer.
- You may make as many items from the pattern as you desire.
- You may do whatever you wish with items you create from the pattern.
- If you do choose to sell your finished products, please give us credit as the pattern designers.
Single User Licence
Your license is non-transferable.
Old English Creations patterns may not be shared, passed on to others, re-sold, or redistributed in any other way.
If your friend needs one of our patterns, please ask them to download their own copy.
This original pattern may not be reproduced by photocopy, posted on the web or sold without written permission from Old English Creations.
Please respect the craft of the artist.

Author Bio
Alison Heathcote, a passionate crochet enthusiast and dedicated business blogger, combines her love for crafting and entrepreneurship to inspire and connect with others.
With a knack for transforming yarn into beautiful creations and a flair for sharing valuable insights about running a successful crochet business, Alison embodies the perfect blend of creativity and practicality.
More Articles
If you enjoyed this post and crochet is your thing, you may like some other crochet articles from our blog.
Crochet Patterns
Author: Alison Heathcote - Published: January 2024 About Our Original Crochet Patterns Finding a crochet pattern can be quite overwhelming with the multitude of options available. However, the real challenge lies in discovering patterns that not only meet your...
Crochet and Self-care
Author: Alison Heathcote - Published: April 2013 - Revised: January 2024 Crochet for Self-care Crochet is a wonderful activity that can provide relaxation, mindfulness, and creativity, making it an ideal addition to your daily self-care routine. Whether you...